
How to add your website and get it working
Updated · First published · 4 min read
This guide takes one site from nothing to verified, audited and one fix better. It takes about an hour, and most of that is waiting for a DNS record to spread.
Note
Before you start: an email address or a Google account, and access to your site's DNS or theme. There is no card to enter and no plan to choose.
Step 1: Sign up and pick the audit
- Go to
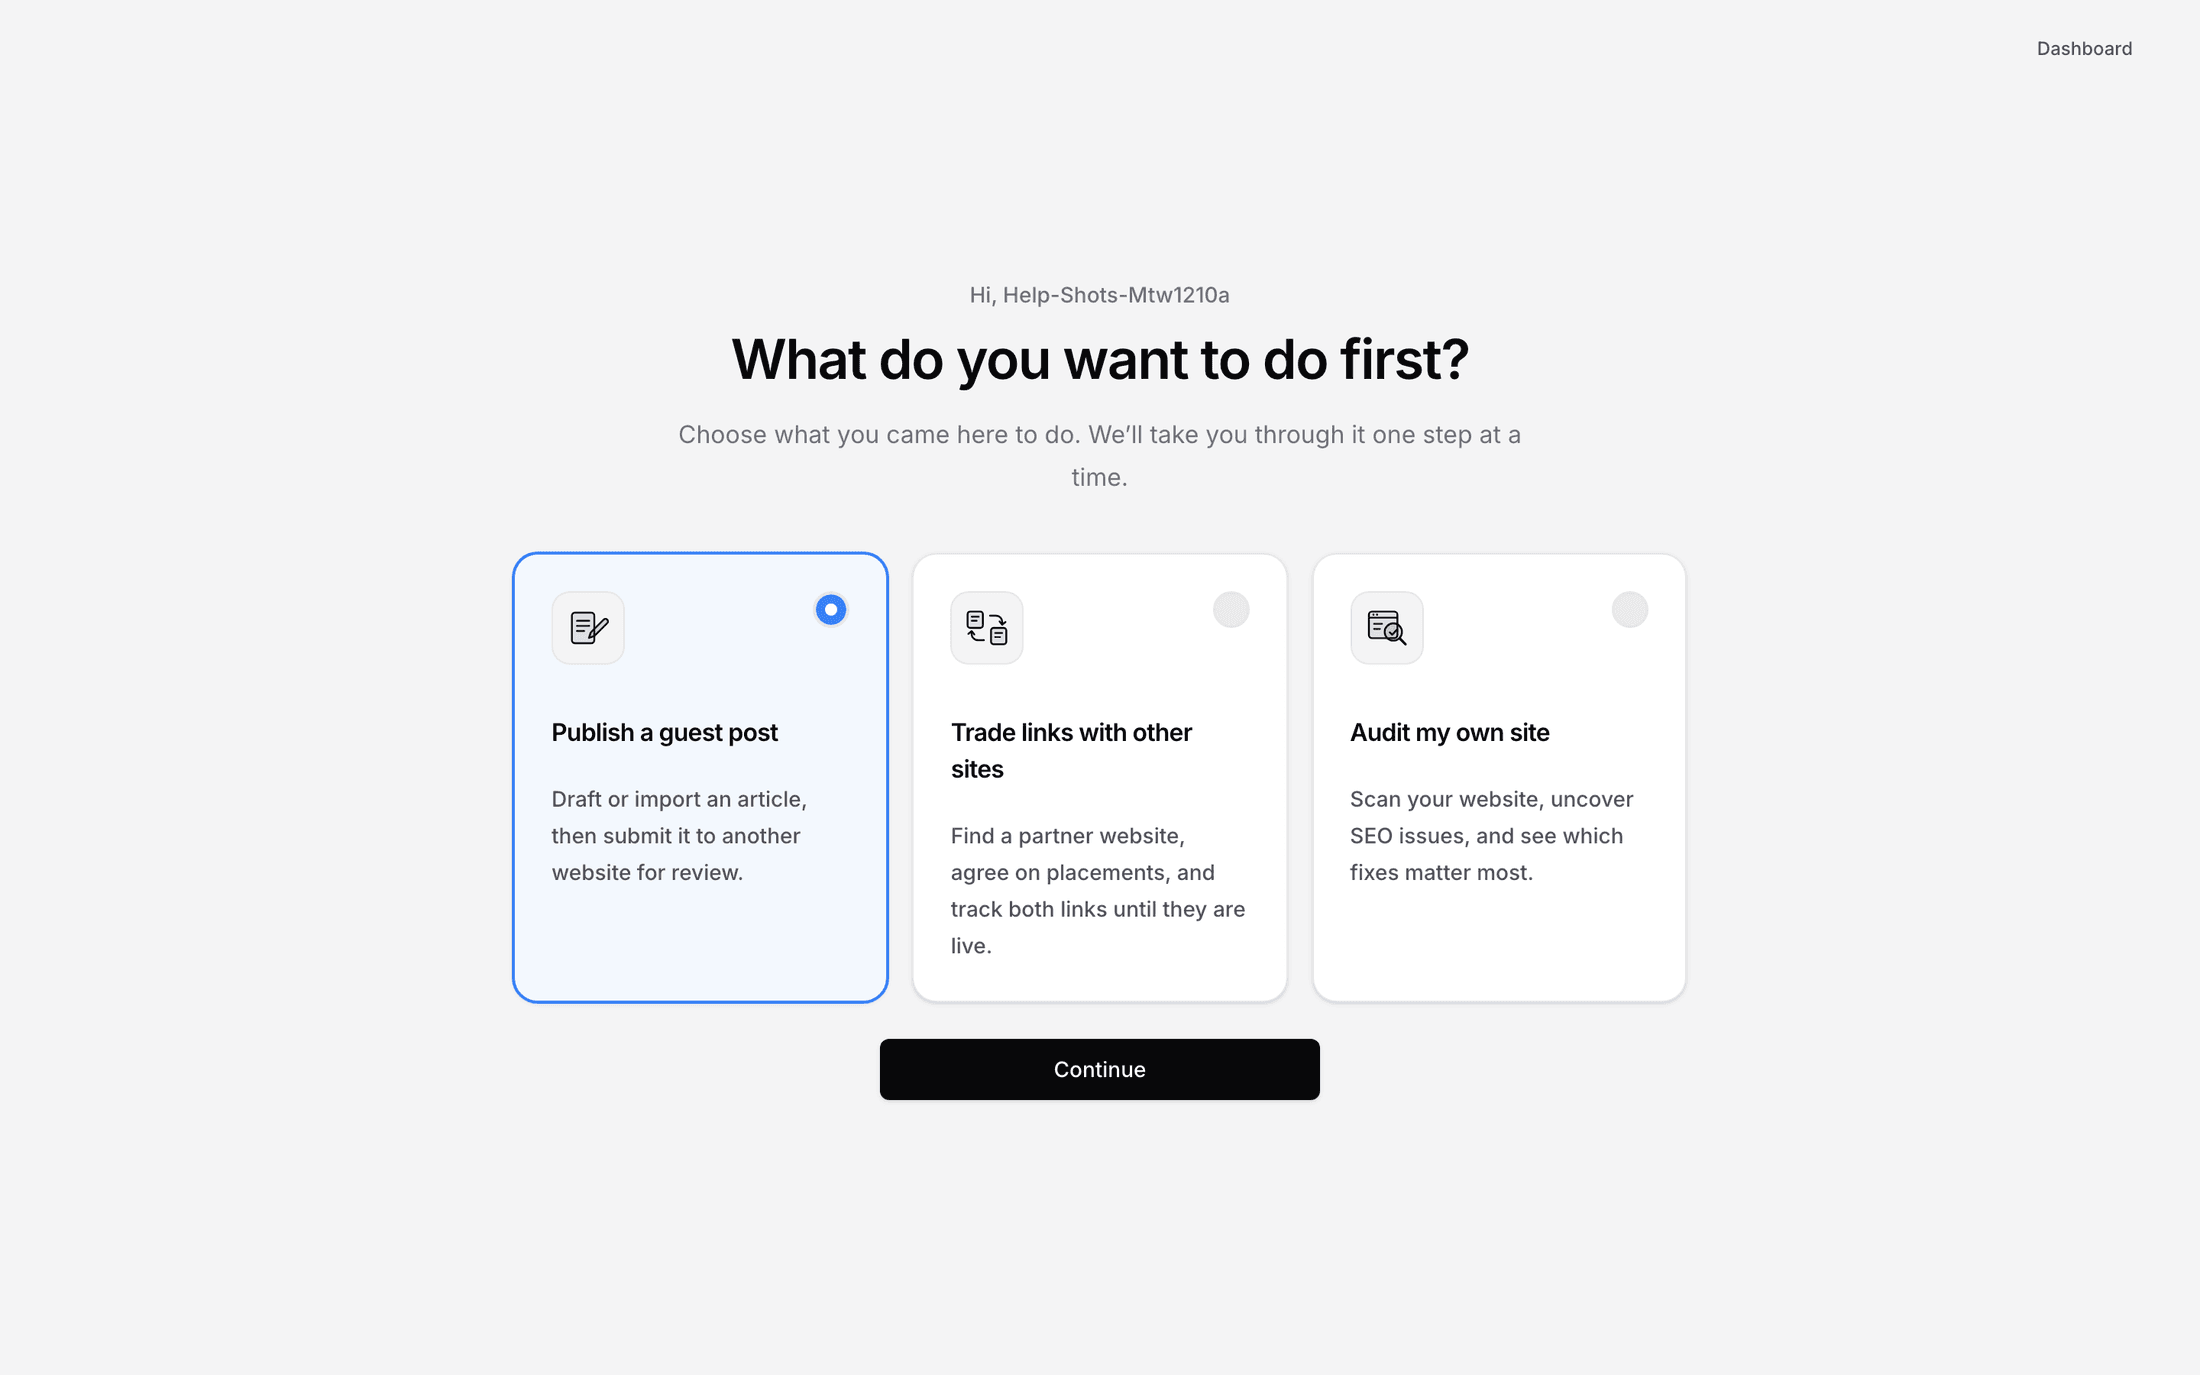
/registerand sign up with an email and password, or with Google. - On Get started, choose Grow my traffic with SEO and a blog. It is already selected unless you came through an invitation for something else.
Step 2: Add the site and check what it read
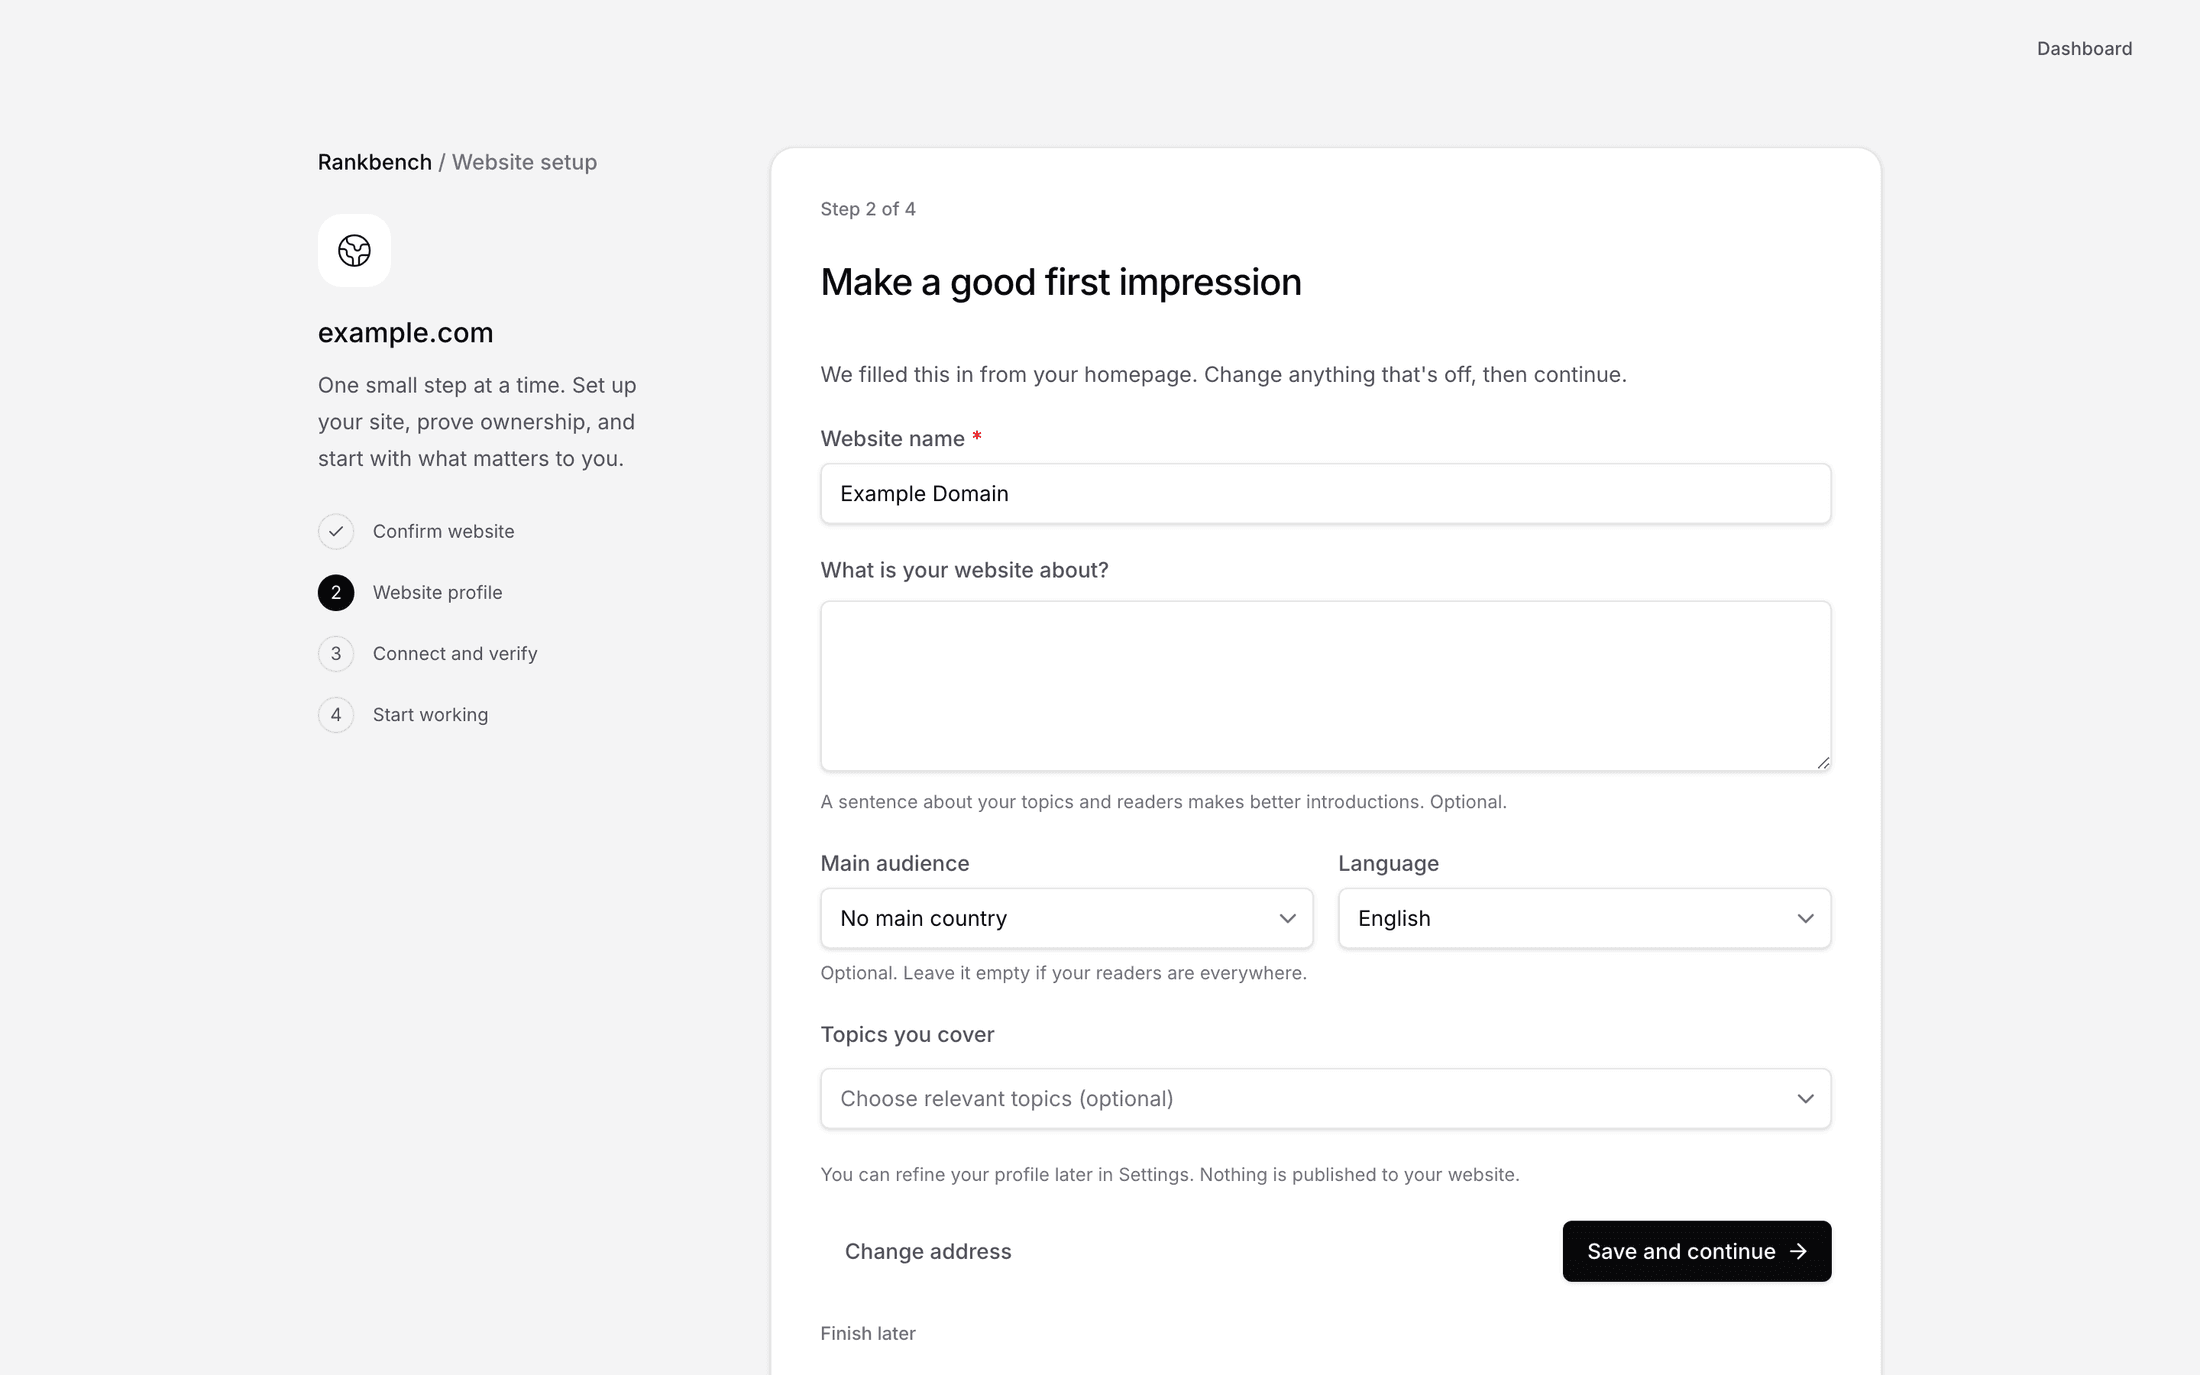
- On Which website should we use?, fill in What's the site called? and Its web address. With or without
https://is fine. - Later, check what Rankbench knows about the site under General in its Settings: what it is about, its main audience, its language and its topics. Adding audience and topics is one of the steps on your setup card.
Step 3: Verify with a method you won't undo
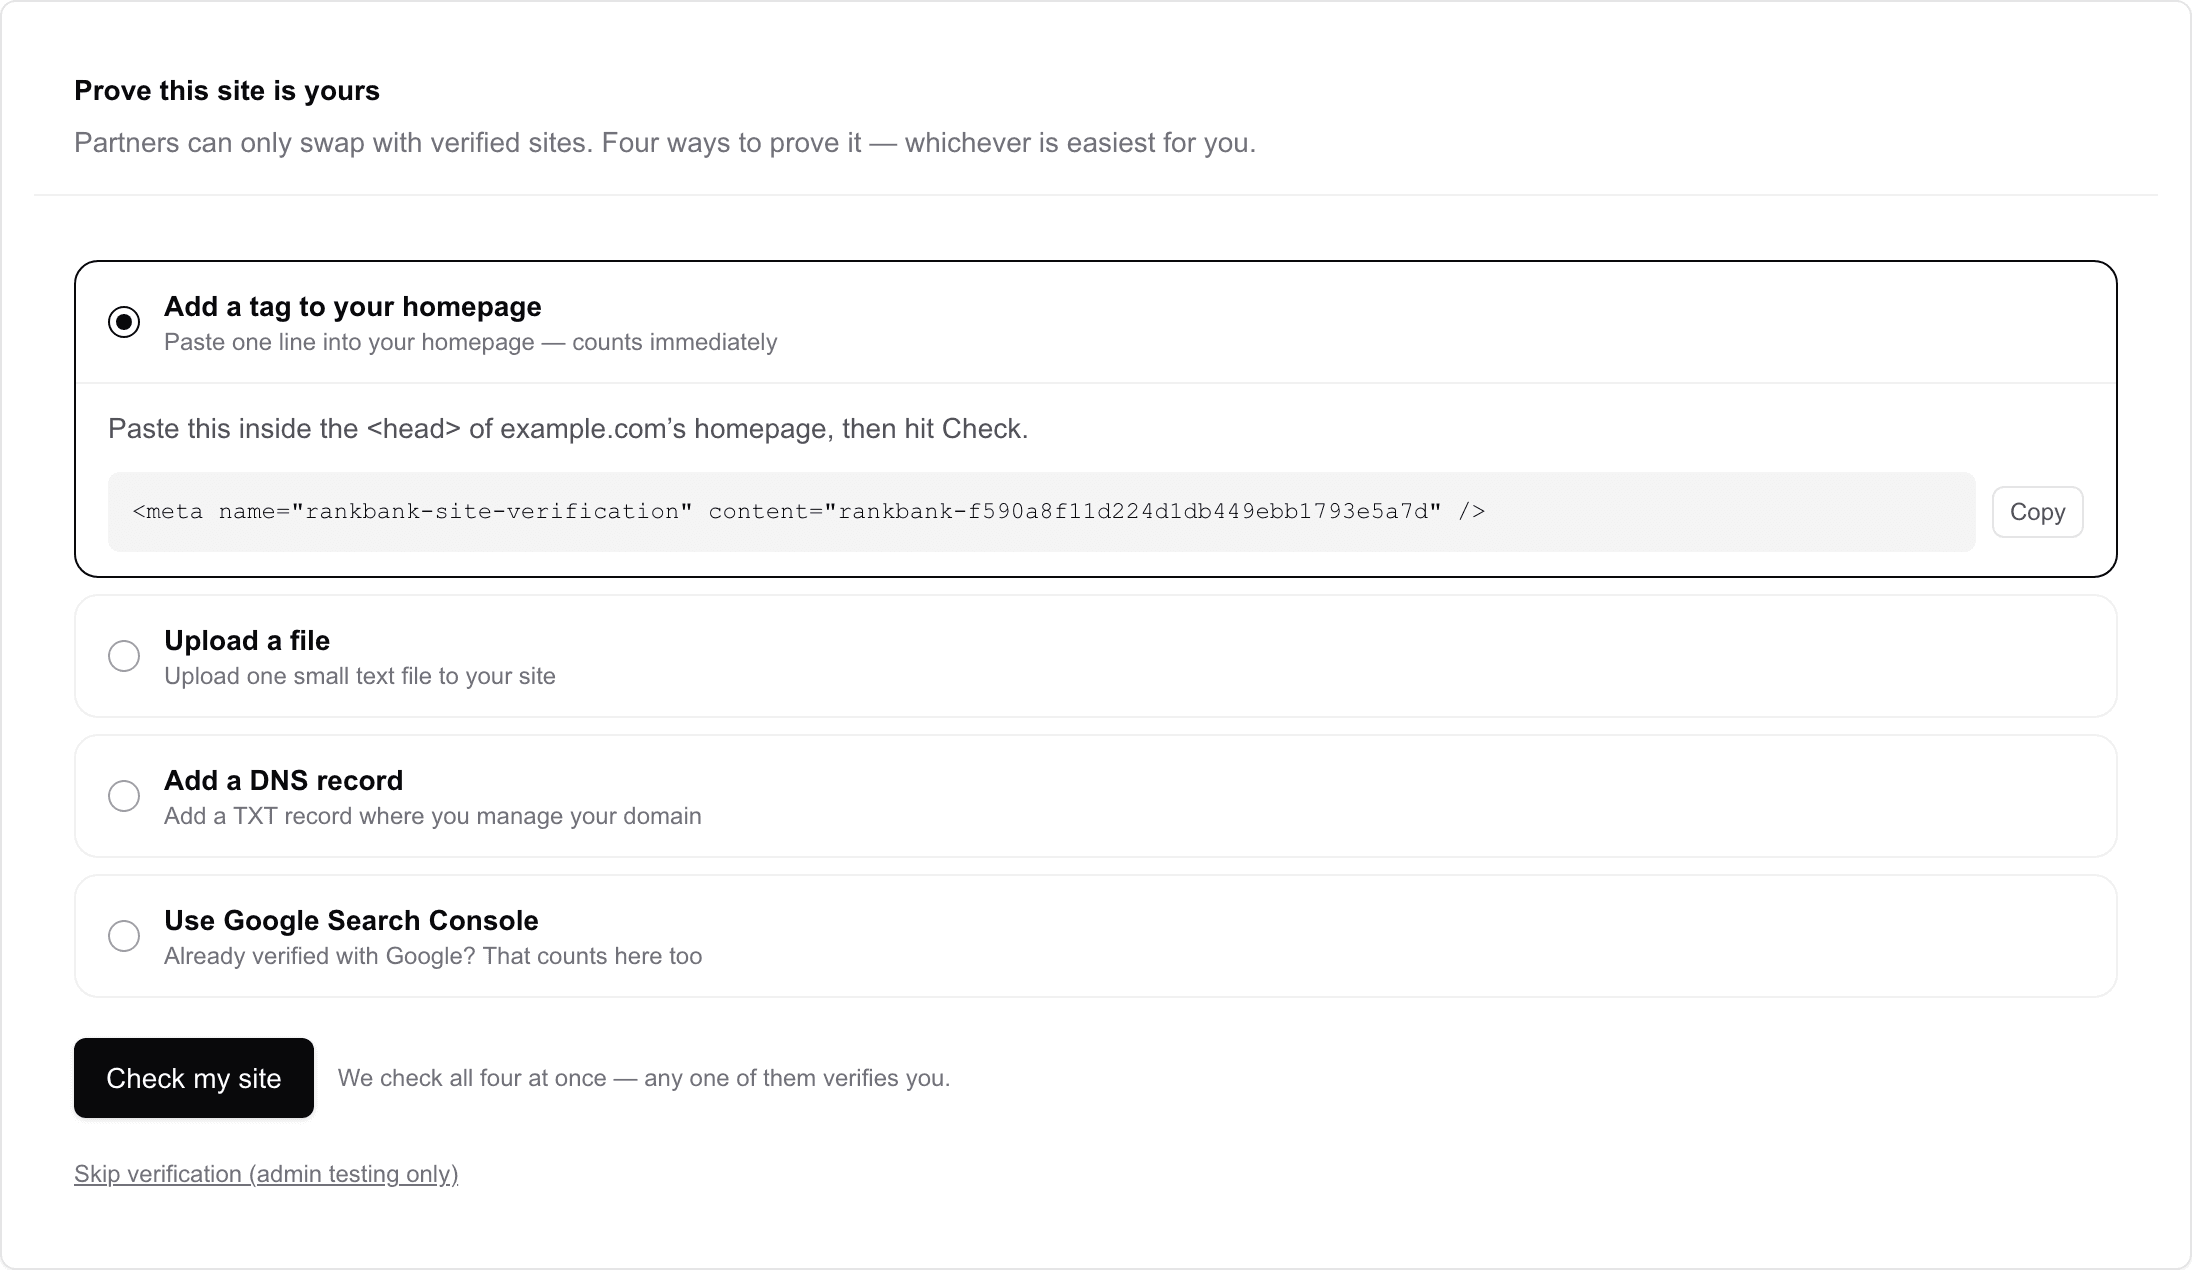
Verification is re-checked, not passed once. If the proof disappears, the site drops back to unverified and everything that depends on it stops. So choose the proof you are least likely to delete by accident.
- If the domain is already in your Google Search Console, press Continue with Google and pick the Google account that has it. Otherwise, open Add a DNS record under Other ways to verify.
- For the DNS record, add it, close the tab, and come back later. An empty first check only means DNS is slow, and Check my site is there whenever you are ready.
Tip
The homepage tag is the quickest proof and the first thing a redesign deletes. A DNS record doesn't live on the website at all, so no redesign or migration can take it out.
When the check passes, the panel names the proof it found. Write that down so nobody removes it later.

Step 4: Run the first audit
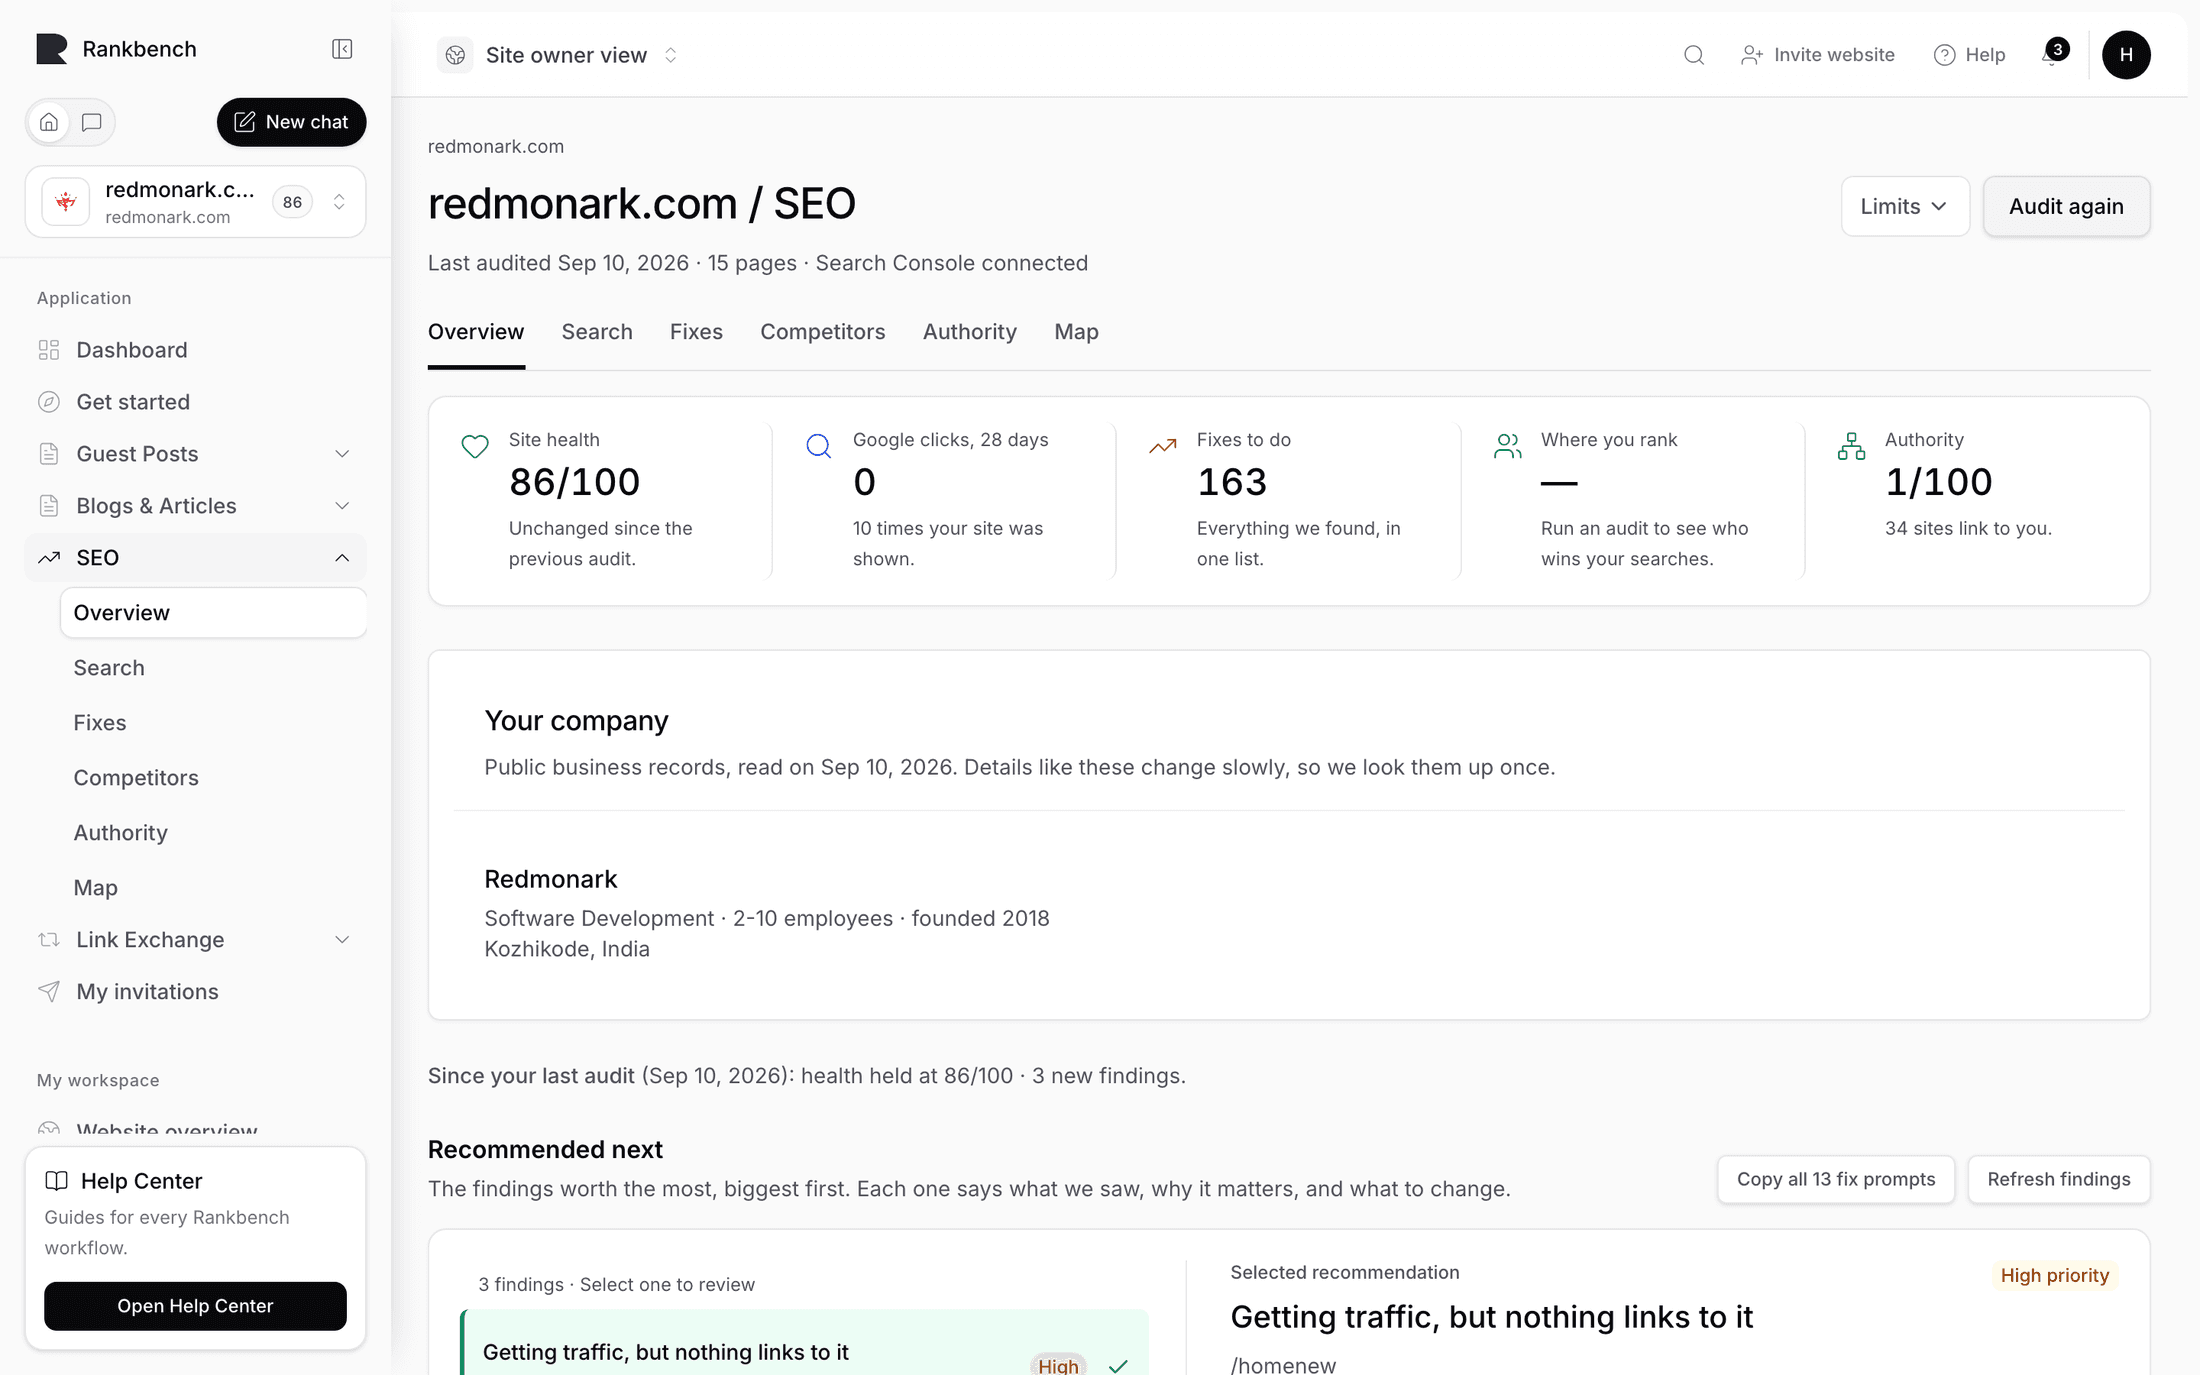
Press Start the audit. Rankbench opens your pages one by one and follows the links between them. Nothing on your site changes. It takes a few minutes and you can leave the tab.
Step 5: Read three things and leave the rest
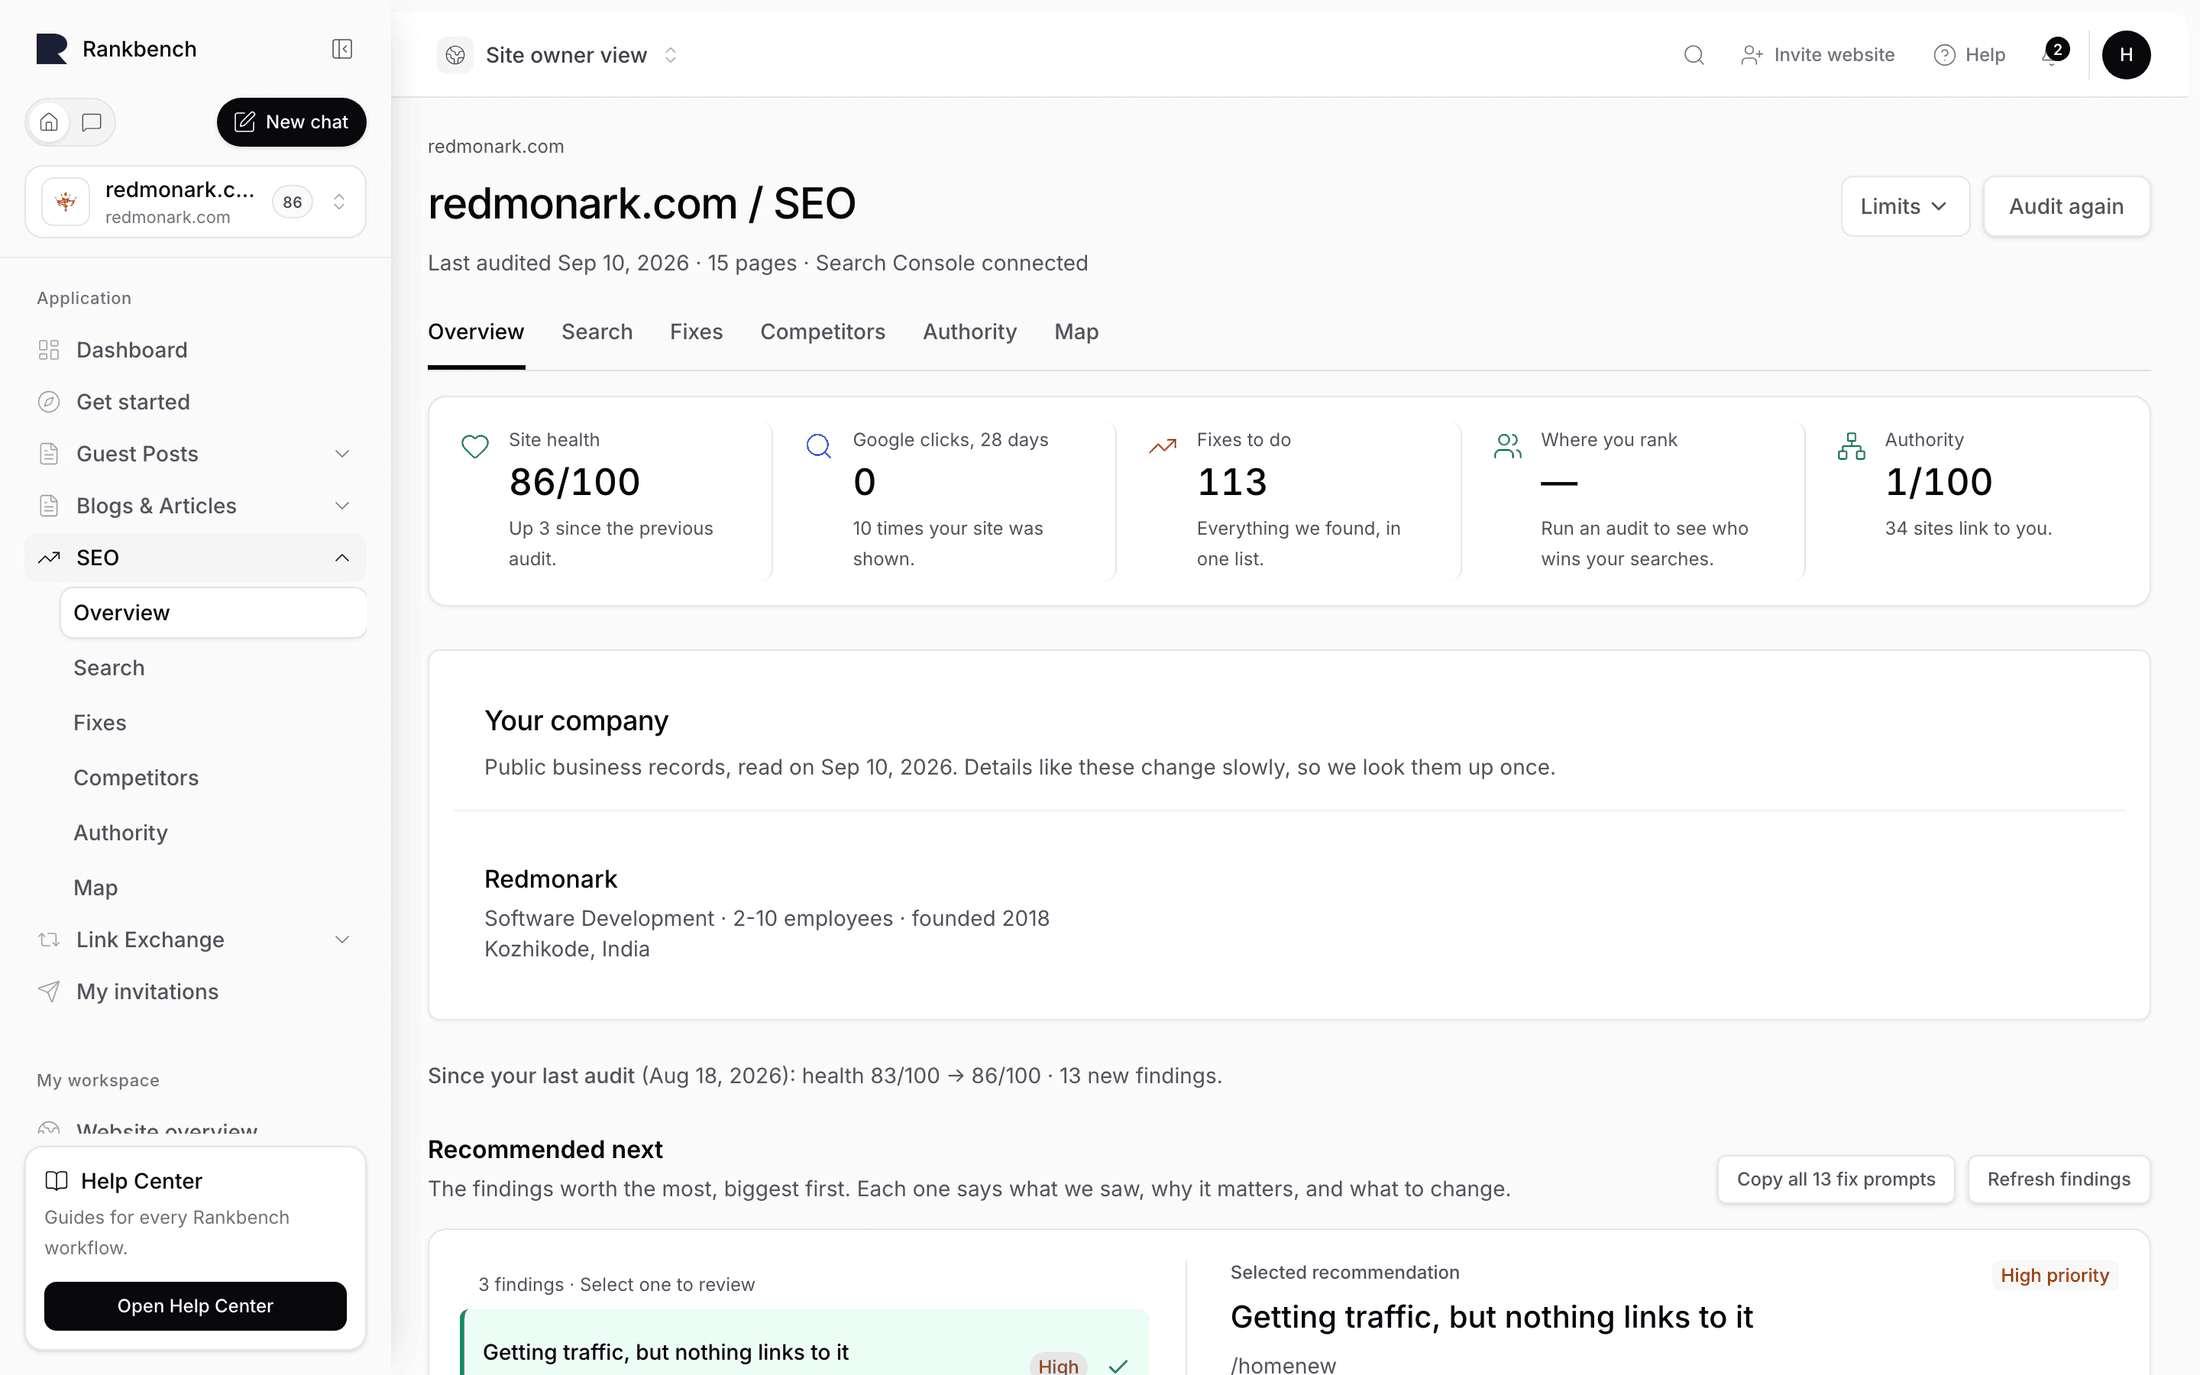
Note down Site health. It scores structural checks out of 100 and says nothing about traffic or rankings, so it is only useful against itself next time. Glance at Fixes to do and don't worry about the size: the list is ordered by what each item costs you, so only the top matters. Then go to Recommended next.
Competitors, authority and the map can wait until next week.
Step 6: Take one fix all the way
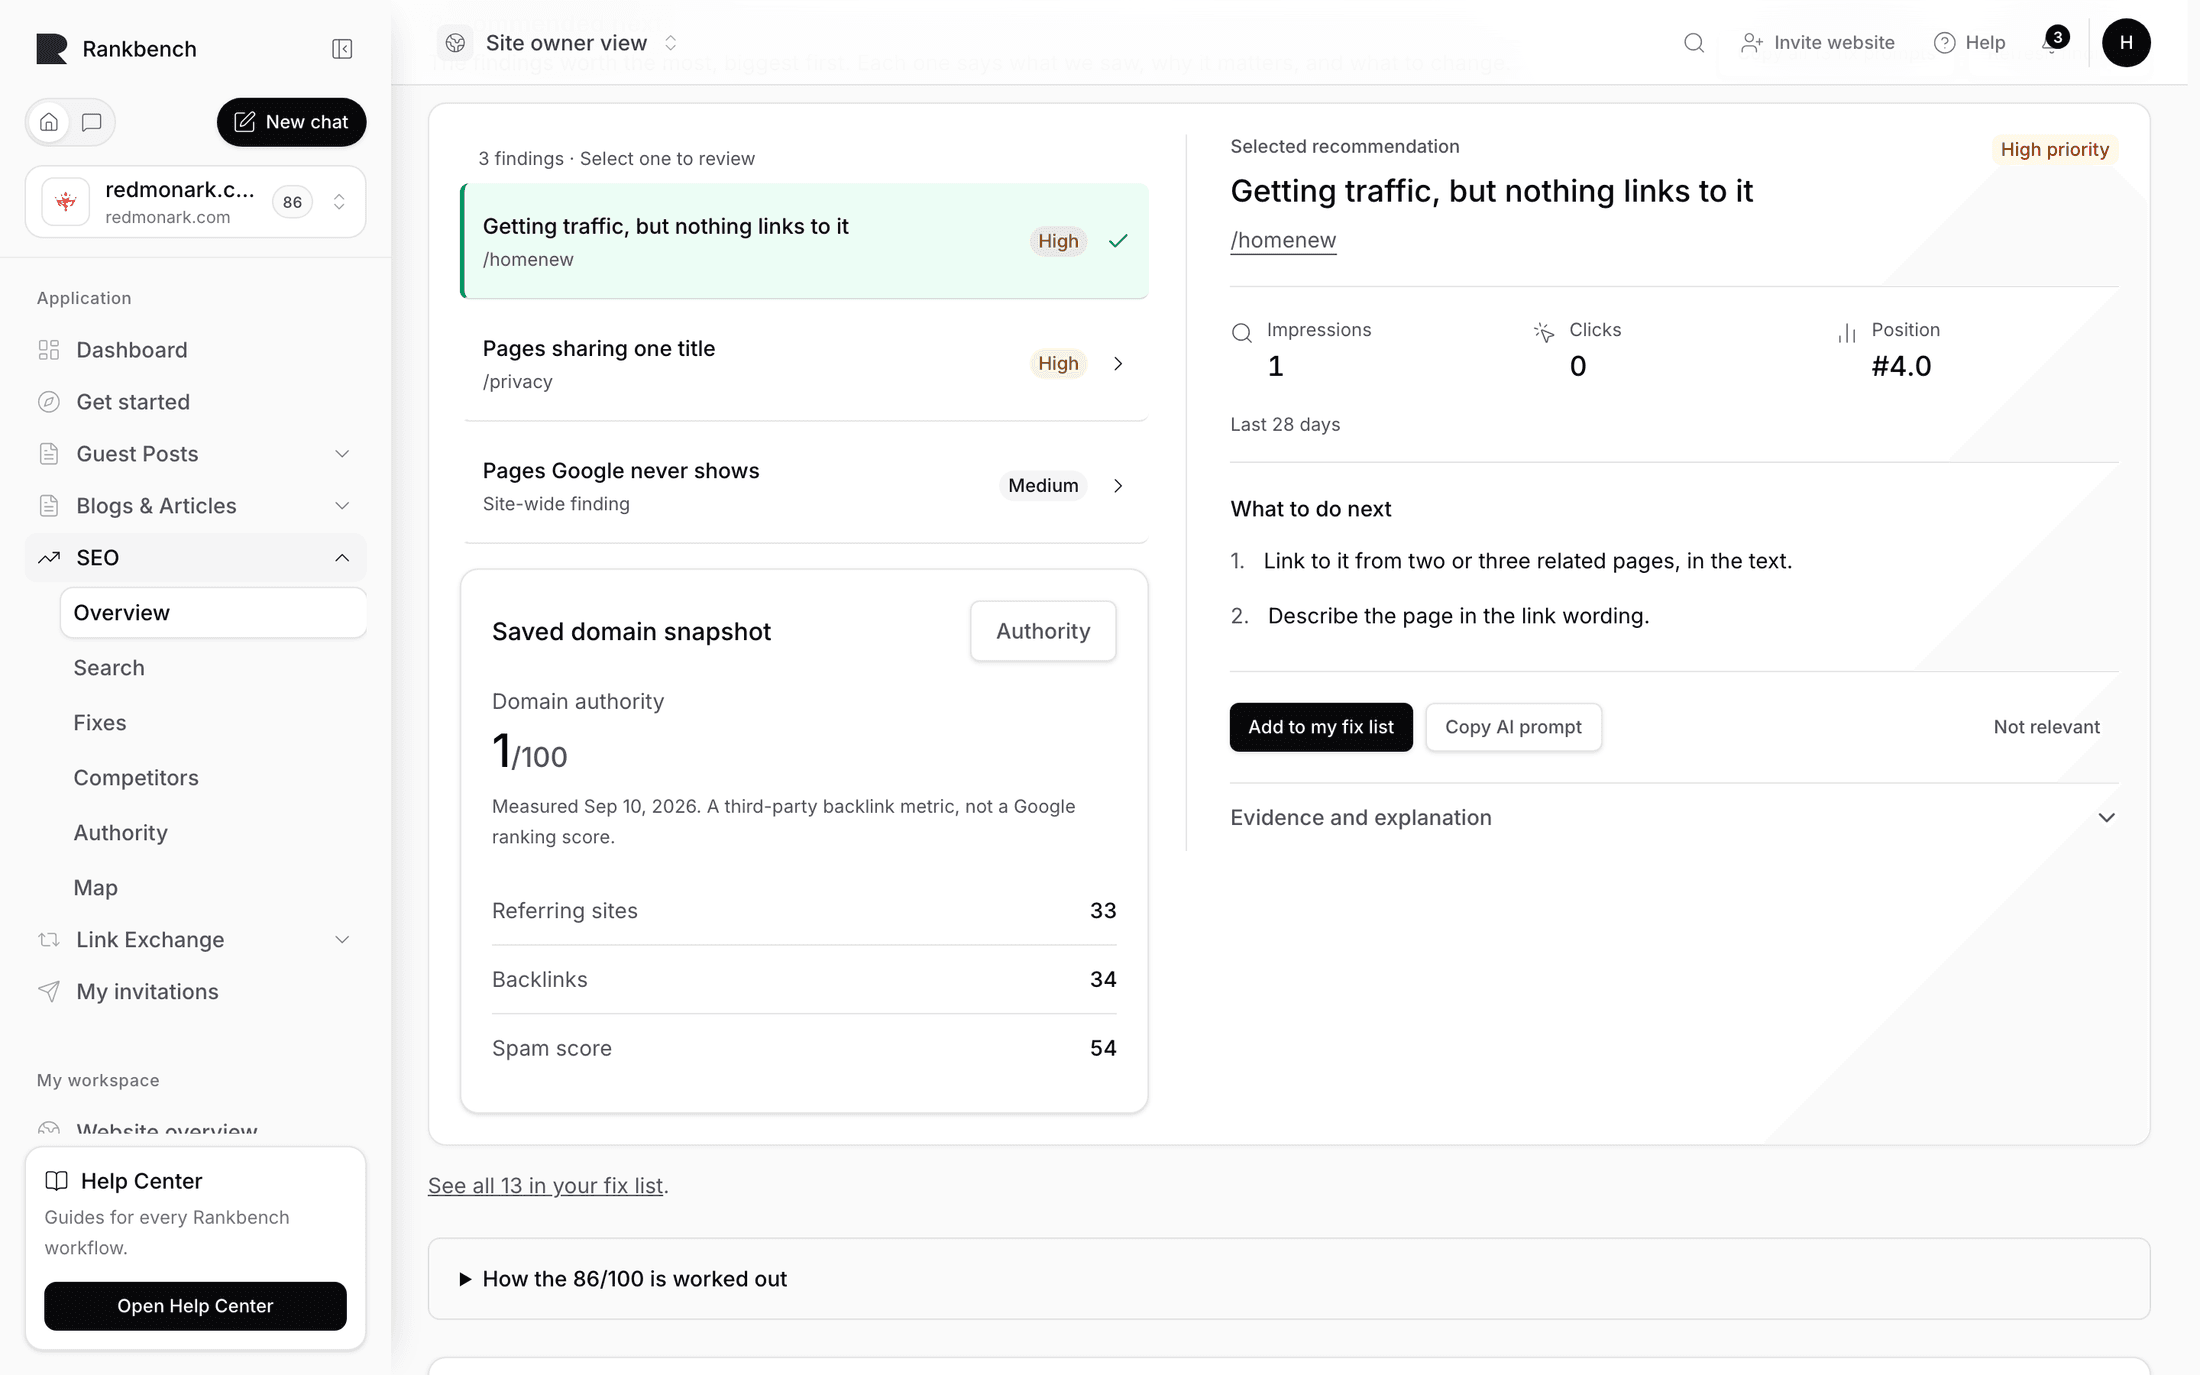
- Open the first item under Recommended next.
- Press Add to my fix list.
- If it's a wording fix, press Copy AI prompt, paste it into the assistant you use, and edit what comes back.
- Make the change in your own CMS and publish it. Rankbench never edits your site.
- Come back and mark it done.
Step 7: Check it landed, then see what's next
Run the audit again once your change is live. The line comparing the two runs tells you whether the work landed. If the fix is still reported, the change was usually made in a preview and never published.
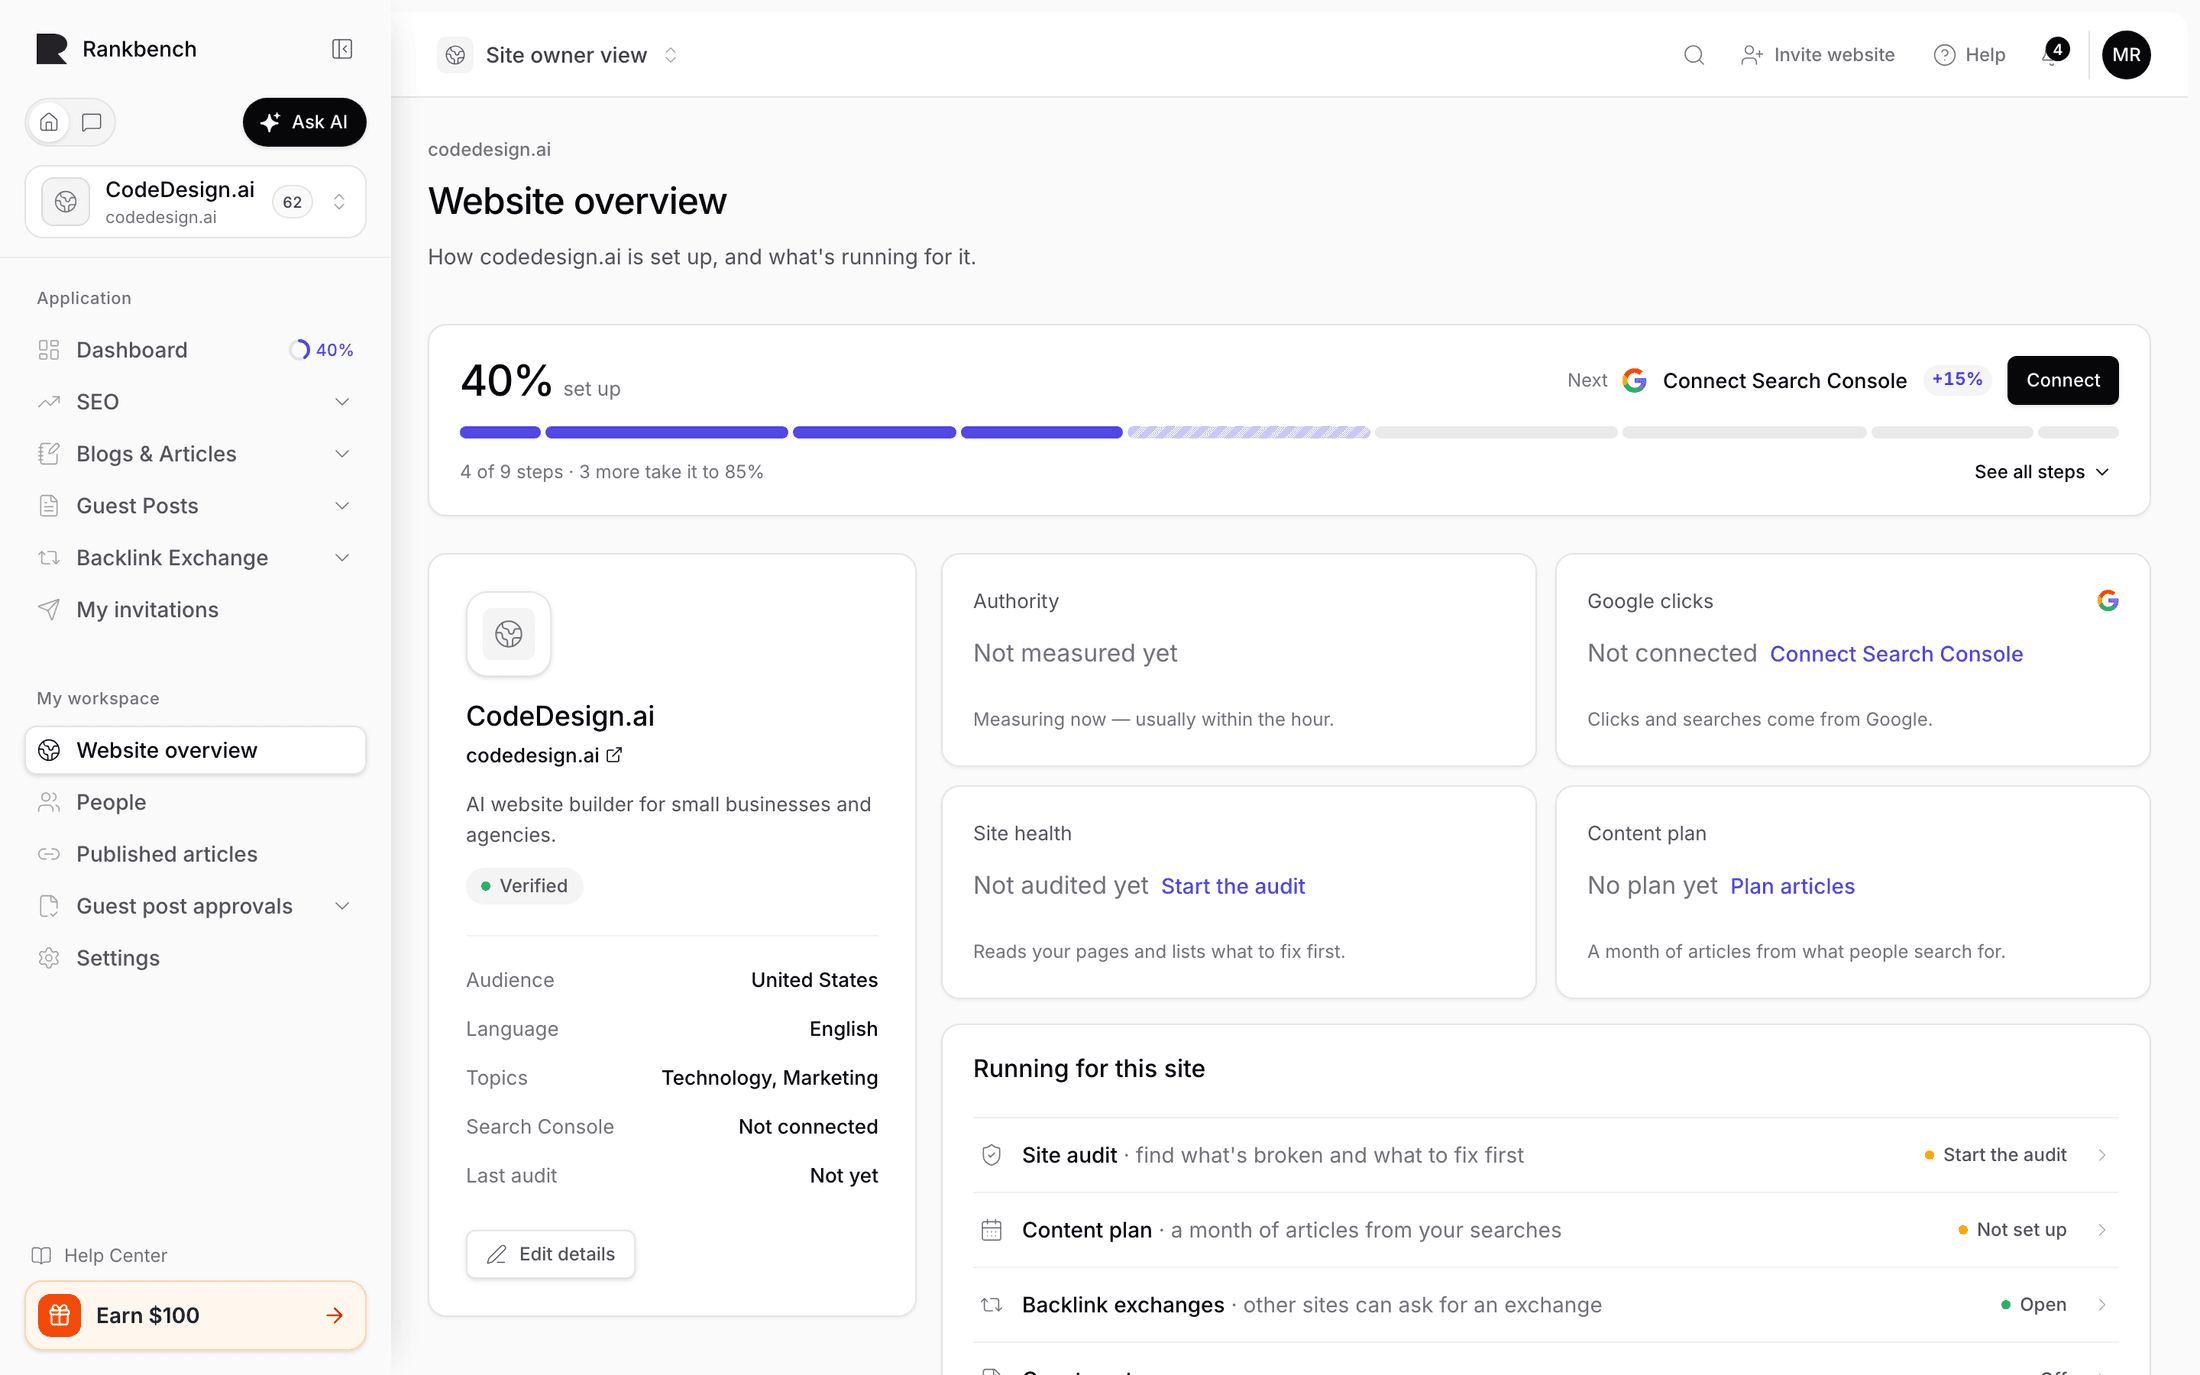
Then open Website overview. The setup card at the top shows how far the site has got and the next step, with a button for it.
Tip
Connect Google Search Console this week. It takes two minutes, and about half of what Rankbench looks for comes from your own click and impression data.
What to do next
Still stuck?
Open Rankbench and the page this article describes — most screens explain themselves as you go.