Running guest posts on your site without letting quality slip
Updated August 24, 2026 · 12 min read
The reason most sites stop accepting guest posts isn't the bad articles. It's the volume of near-misses: pitches that are almost on topic, drafts that are almost long enough, link profiles that are almost reasonable. Each one costs you twenty minutes to decline politely.
The fix is upstream. Sites that run a healthy intake spend an hour writing rules that reject the wrong pitches before anybody writes them, then review the survivors properly. That's what this walkthrough sets up. By the end you'll have published guidelines, a submission link you can hand out, one article reviewed and published, and a record you can defend six months from now.
The writer's side of the same pipeline is writing a guest post that gets accepted. Reading it is worth twenty minutes, because knowing what your authors see explains most of what follows.
What you'll have by the end
- Guidelines published as a version, with a topics-you-never-accept list doing the heavy lifting
- A shareable
/submit/{slug}link, and a site that appears as accepting guest posts - One submission reviewed with comments tied to actual sentences, then approved
- A published article whose live page has been fetched and checked, filed automatically in your Content Library
Turning intake on
Two switches make this real, and they're in different places because they mean different things.
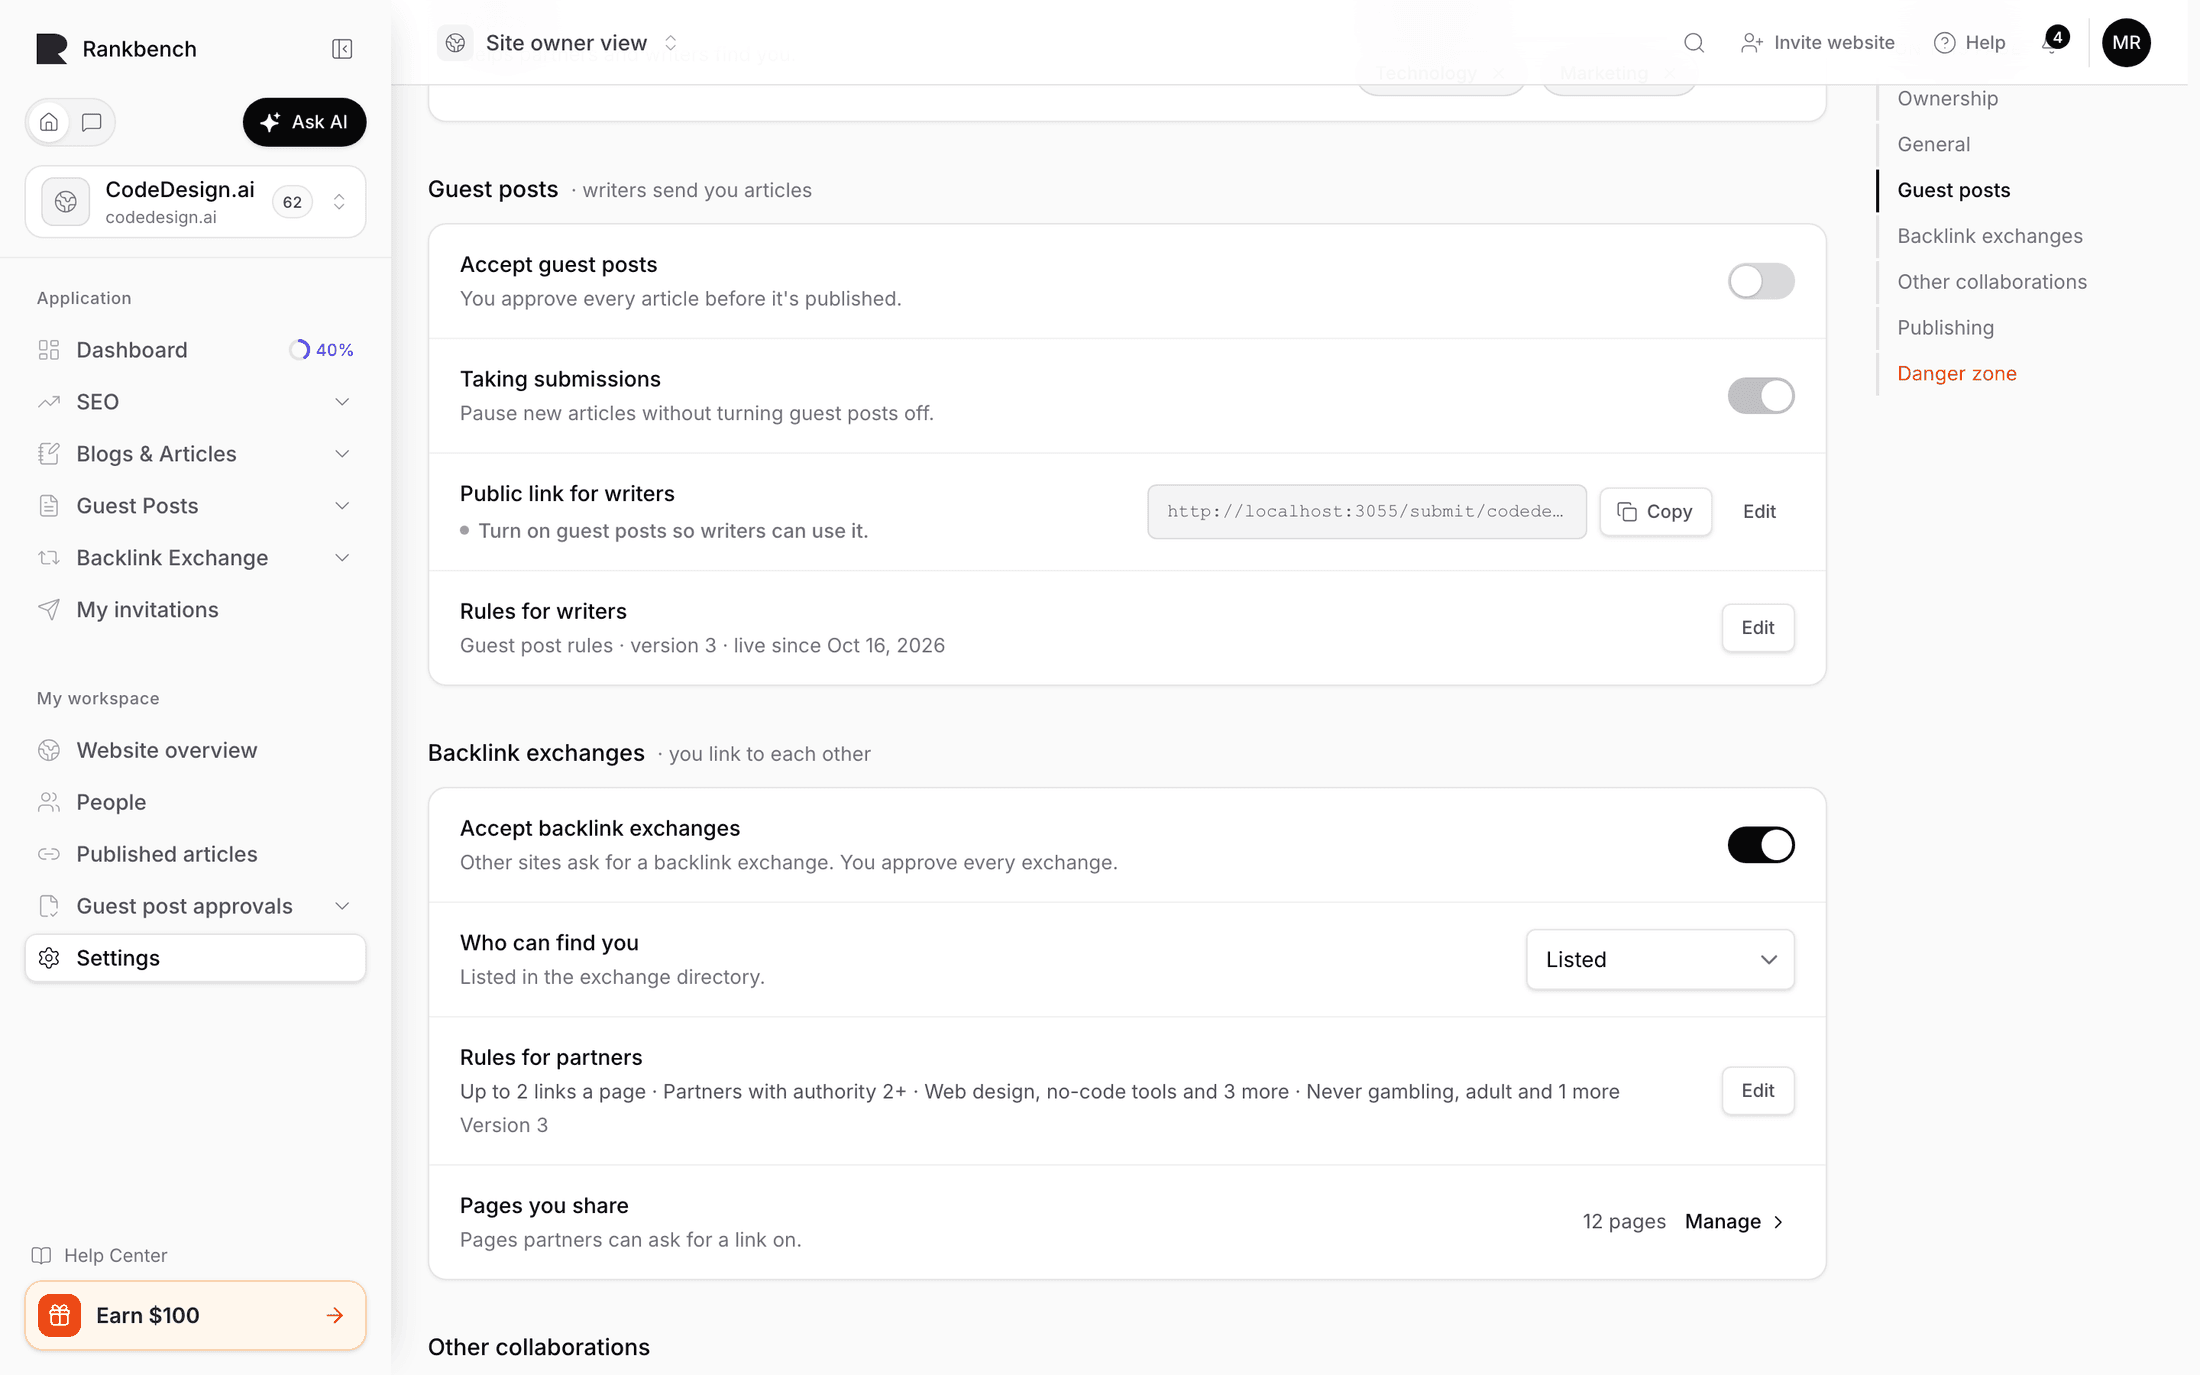
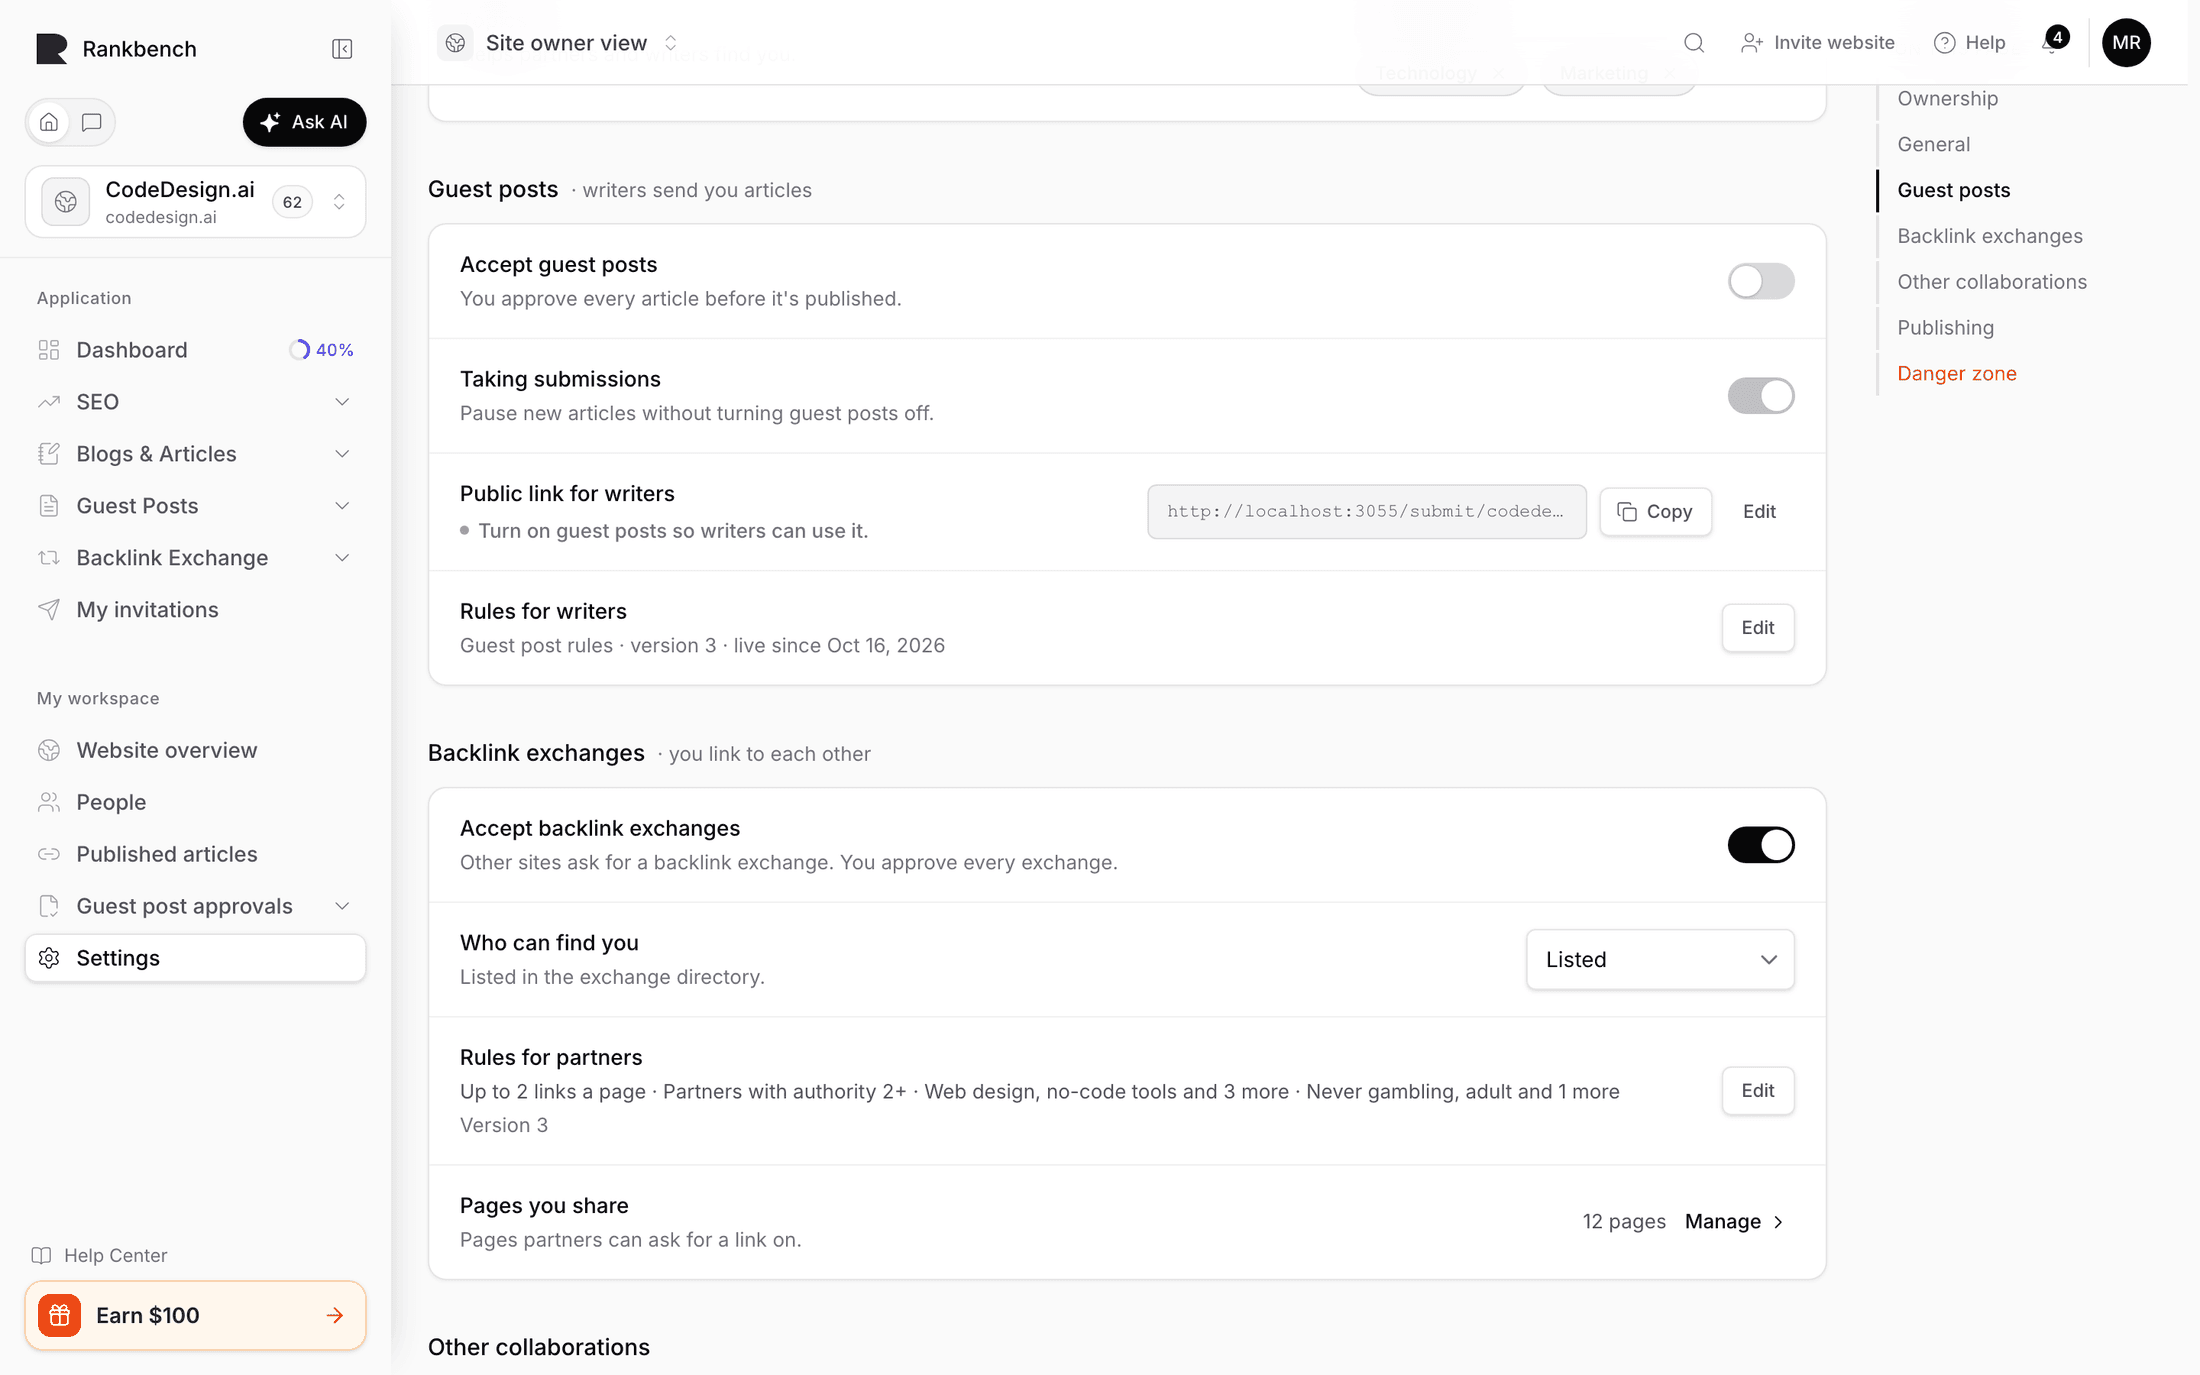
Your organisation needs Accept Guest Posts under Collaboration Access in Organisation Settings. That's the workspace saying it does this at all.
Each website needs its own Accept guest posts switch in the website's settings. That's you deciding which of your sites are open, which matters as soon as you manage more than one.

While you're in Organisation Settings, fill in the Organisation Profile properly. Name, website URL, root domain, target country, primary language, categories, and a short description. Authors see all of it on the public landing page, and it's the only thing they have to judge whether you're worth writing for. A blank description reads as an abandoned site.
One thing to know now, because it saves confusion later: a site with no published guidelines does not appear as accepting guest posts. Turning the switches on is necessary and not sufficient. Write the rules first.
Guidelines that pre-reject bad pitches
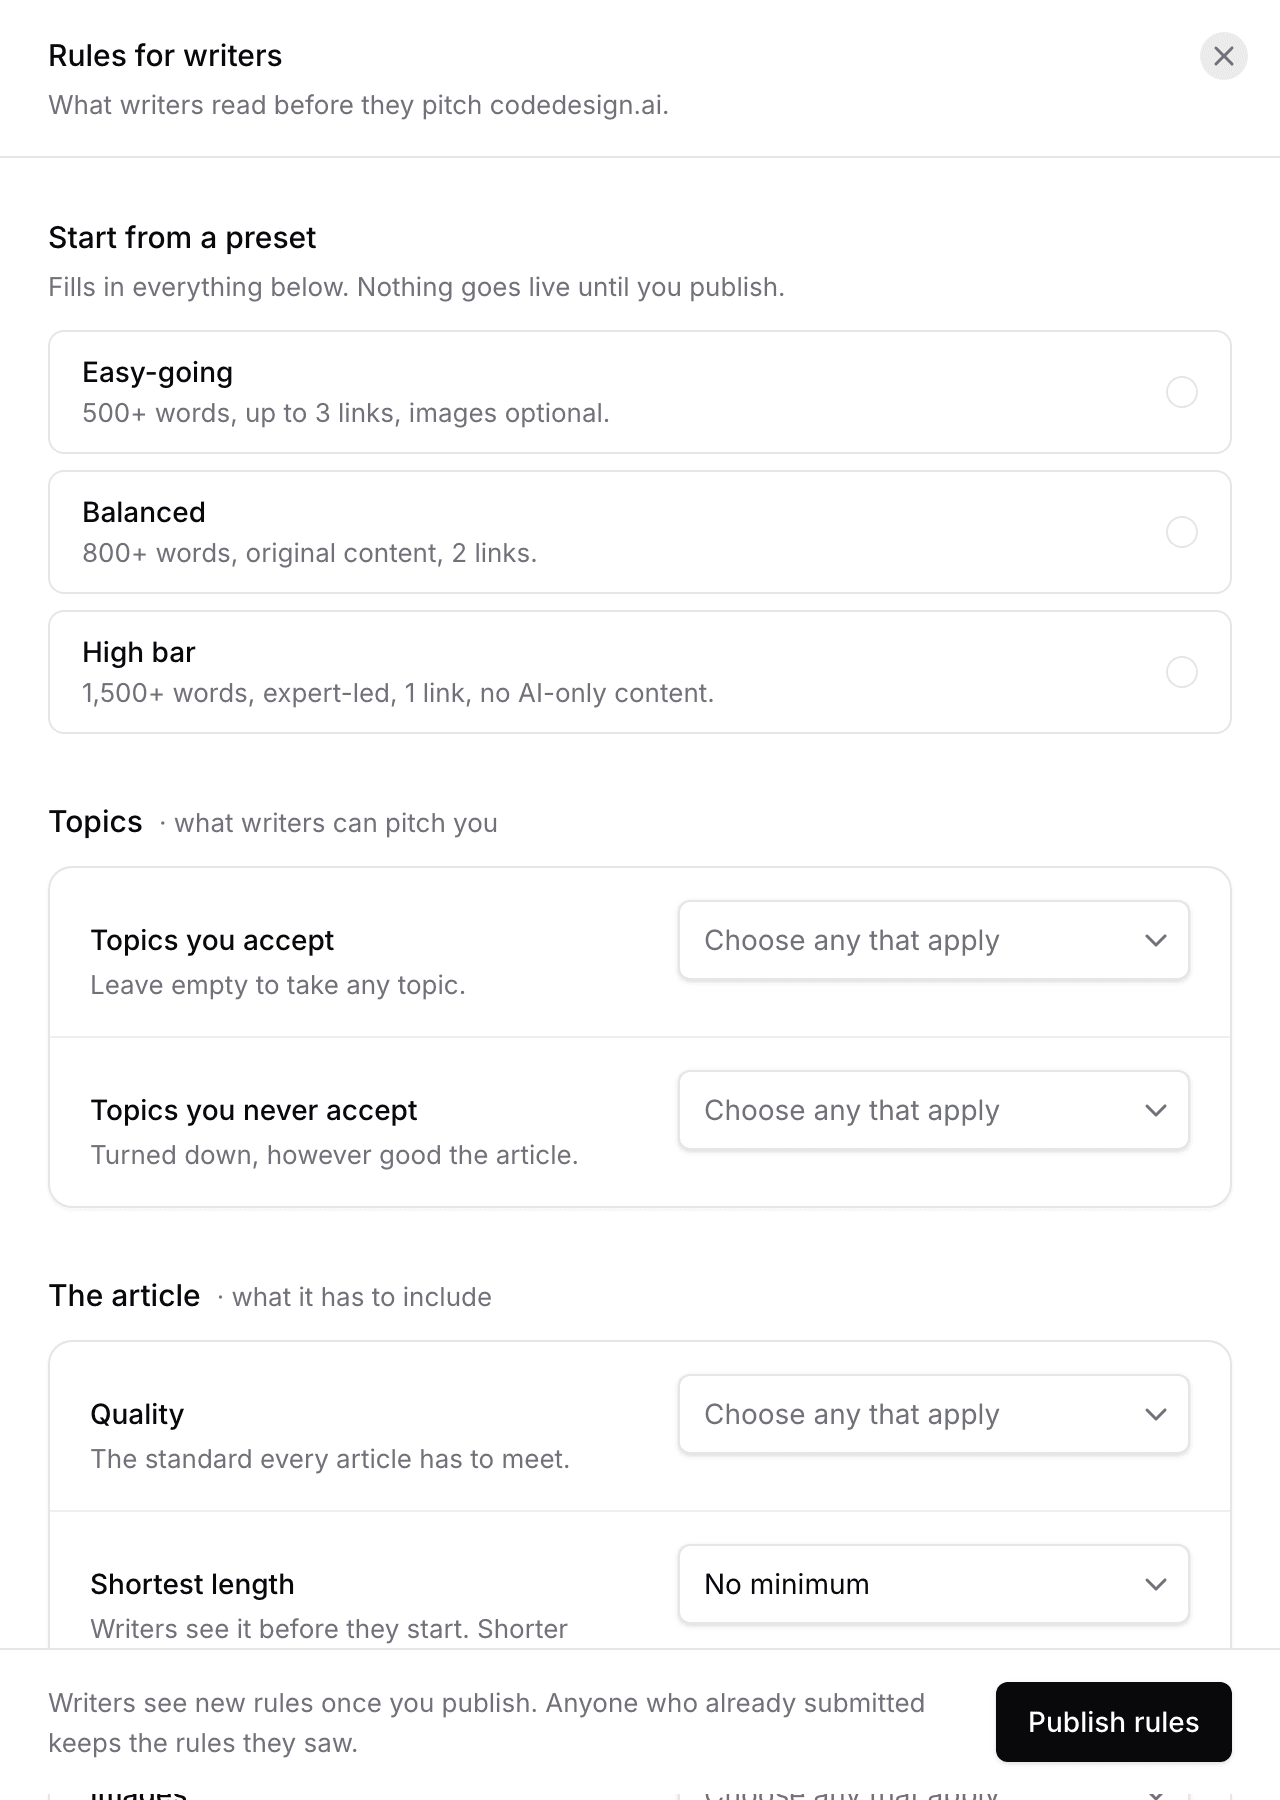
Open the website and go to its guideline versions. Press to start a draft. The form is grouped the way an author reads it, and every field is optional, which is a trap worth avoiding. Skipping the two fields below is why intakes get flooded.

Topics you accept and Topics you never accept sit under a group headed "What you'll publish", and its explanation is the whole strategy: naming the subjects you accept, and the ones you never do, stops pitches you were always going to reject.
Be specific in both directions. "Marketing" accepts everything. "Demand generation for B2B software, with examples from real campaigns" accepts a much narrower and much better set. And the never list is worth more than the accept list, because it's the one nobody expects and everybody reads. Mine usually includes things like listicles built from other listicles, anything about crypto or gambling, generic "ultimate guide to SEO" pieces, and vendor comparisons that happen to be won by the author's employer.
Under "What the article itself must include", set a real minimum length and say what quality means to you. Under "Your rules for links", set the maximum number of links to other sites, say whether links must be contextual, and state your anchor text policy. Its group header is refreshingly direct about why authors are here at all: most guest authors want the link back to their own site. So tell them what you'll allow before they build an article around four of them.
Under "What authors can expect from you", fill in how long you take. It's the one field that's a promise rather than a rule, and answering it stops the follow-up messages.
Save. That creates a draft nobody else can see, and the screen tells you so. Read it once as if you were an author with a half-finished draft, then press Publish v1.

From that moment authors see it, and this is the model worth understanding. Only one version is live at a time. Once published, a version can never be edited, so when your rules change you write a new one and publish that. Every submission records which version the author accepted, so an author can always be shown exactly the rules that applied when they submitted. Nobody argues about the goalposts because there aren't any to move.
Writing your guidelines covers every field and the presets.
Handing out the link
Back in Organisation Settings, look at Discovery And Submission.

Visibility has four values and they're not subtle. Public means you appear where authors look. Private means you don't. Invite Only means somebody needs a personal invitation. Paused blocks submission entirely, and the Paused reason field is shown to anyone who arrives, so write a real sentence there rather than leaving it blank.
Set the public submission slug. The helper shows the URL it produces: /submit/{slug}. That's your link. Put it in your site's write-for-us page, in your newsletter, in the reply you send when somebody asks. Anyone who opens it sees your profile, your status, and a teaser of your rules with its version number, and can create a free account and come straight back.
Nothing is emailed by Rankbank, here or anywhere. If you use the Invite a website dialog, it produces a link you copy and send yourself, and its own advice is worth taking: invitations from a person get read, invitations from platforms get deleted.
Opening your site to guest posts covers the switches and visibility in full.
The first submission arrives
You'll get a notification in the bell: a new guest post to review, marked as needing action. There is no email, so build the habit of checking the bell or the queue.
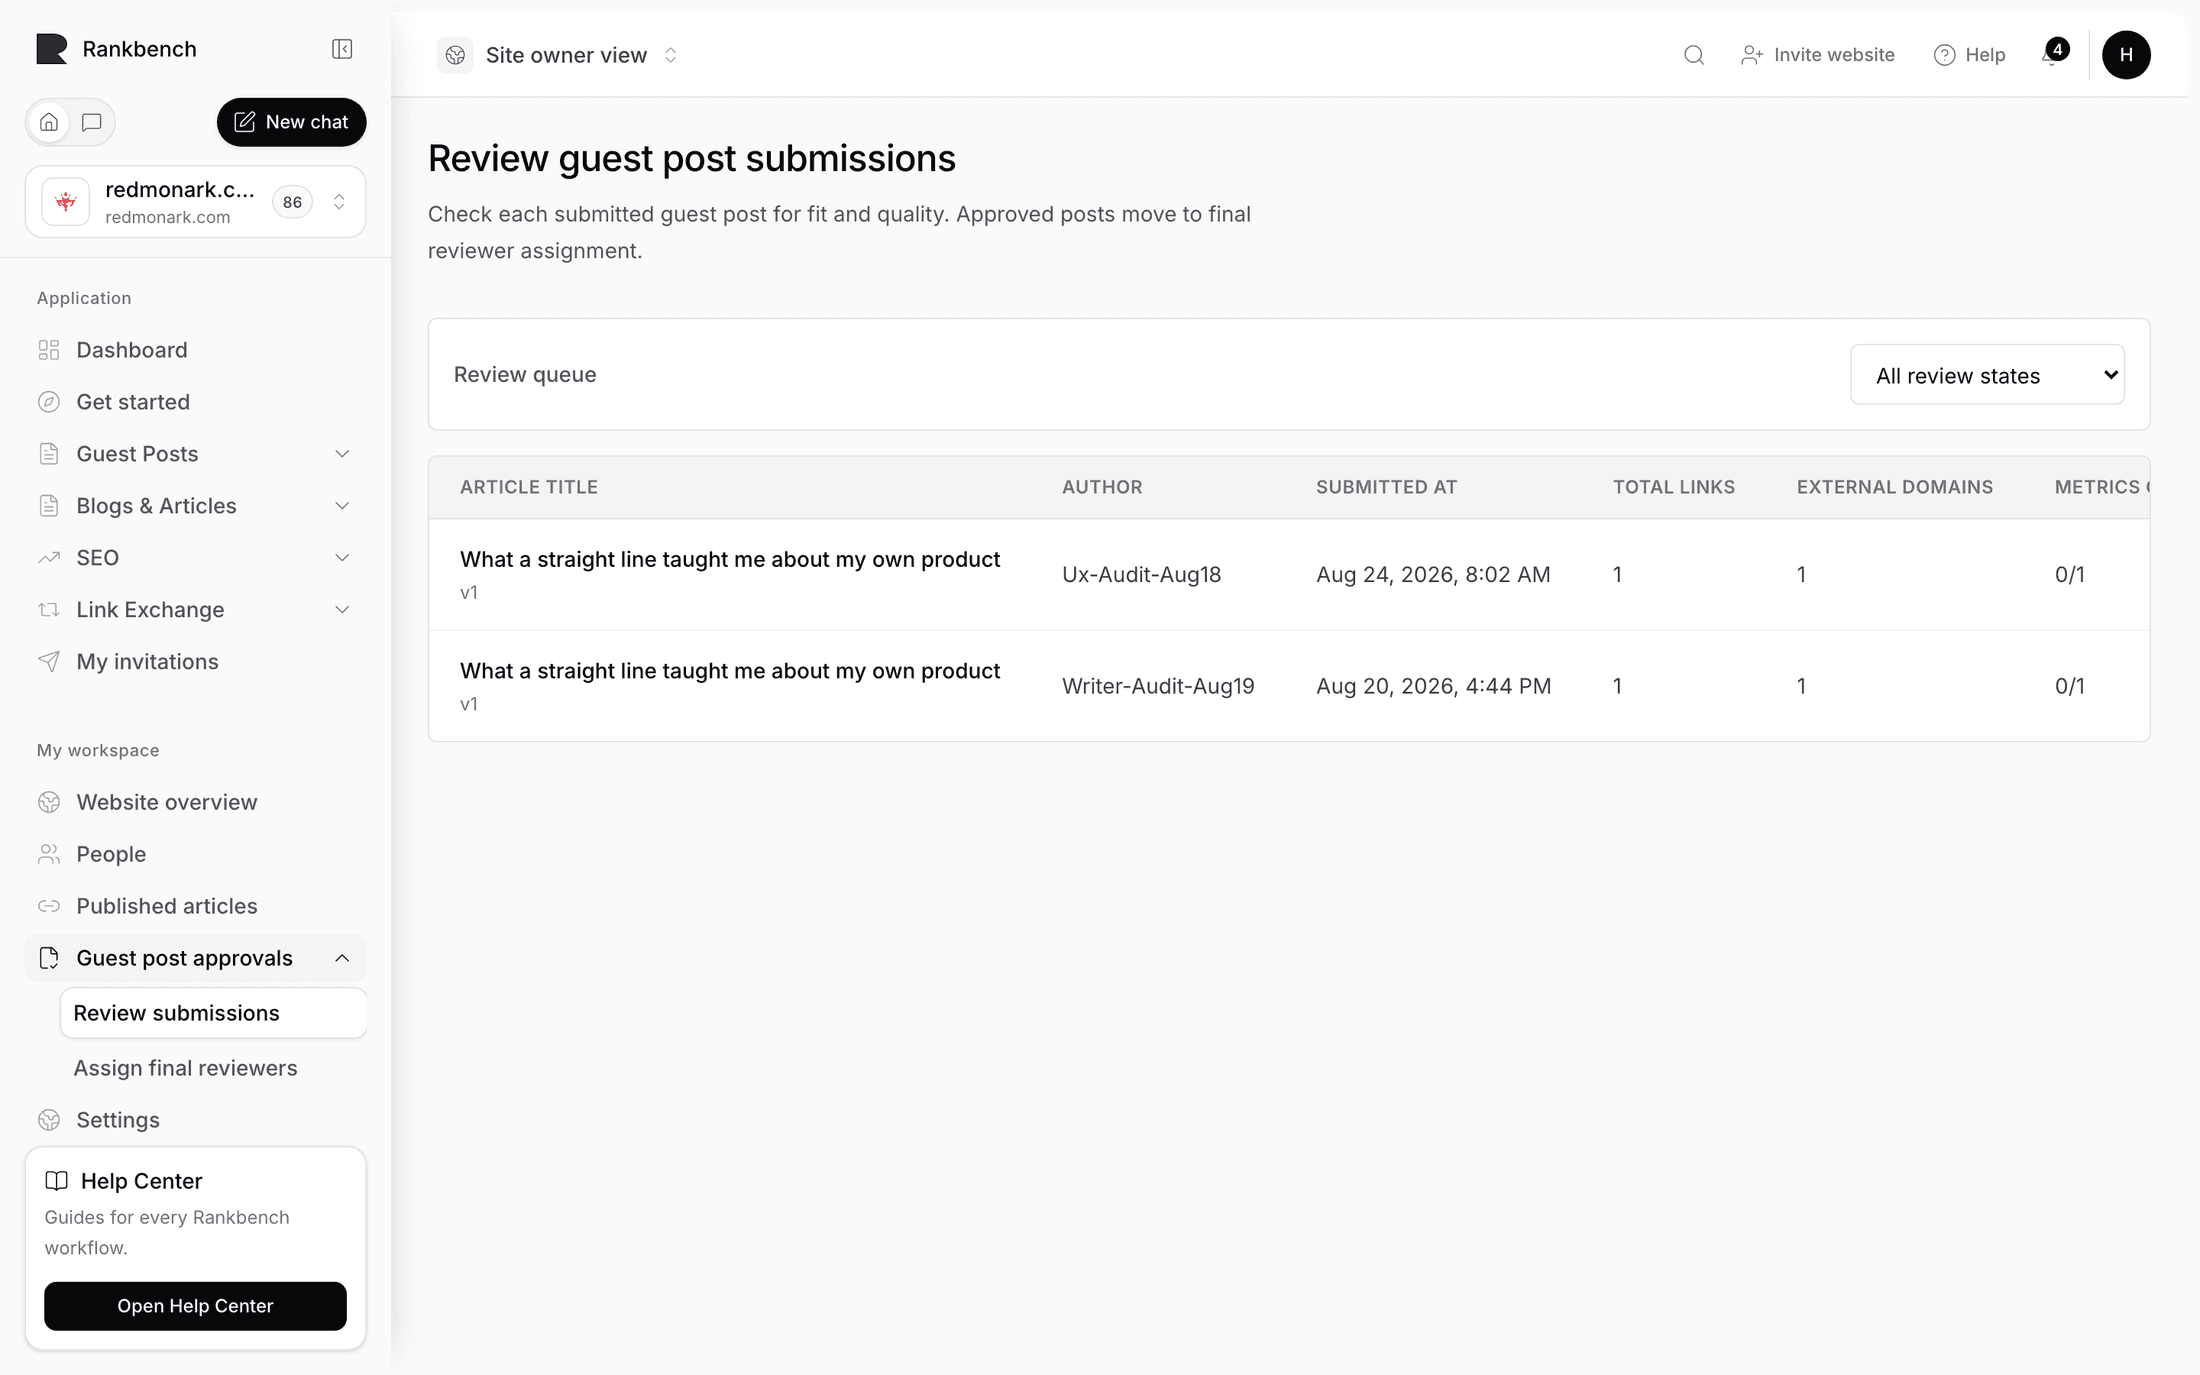
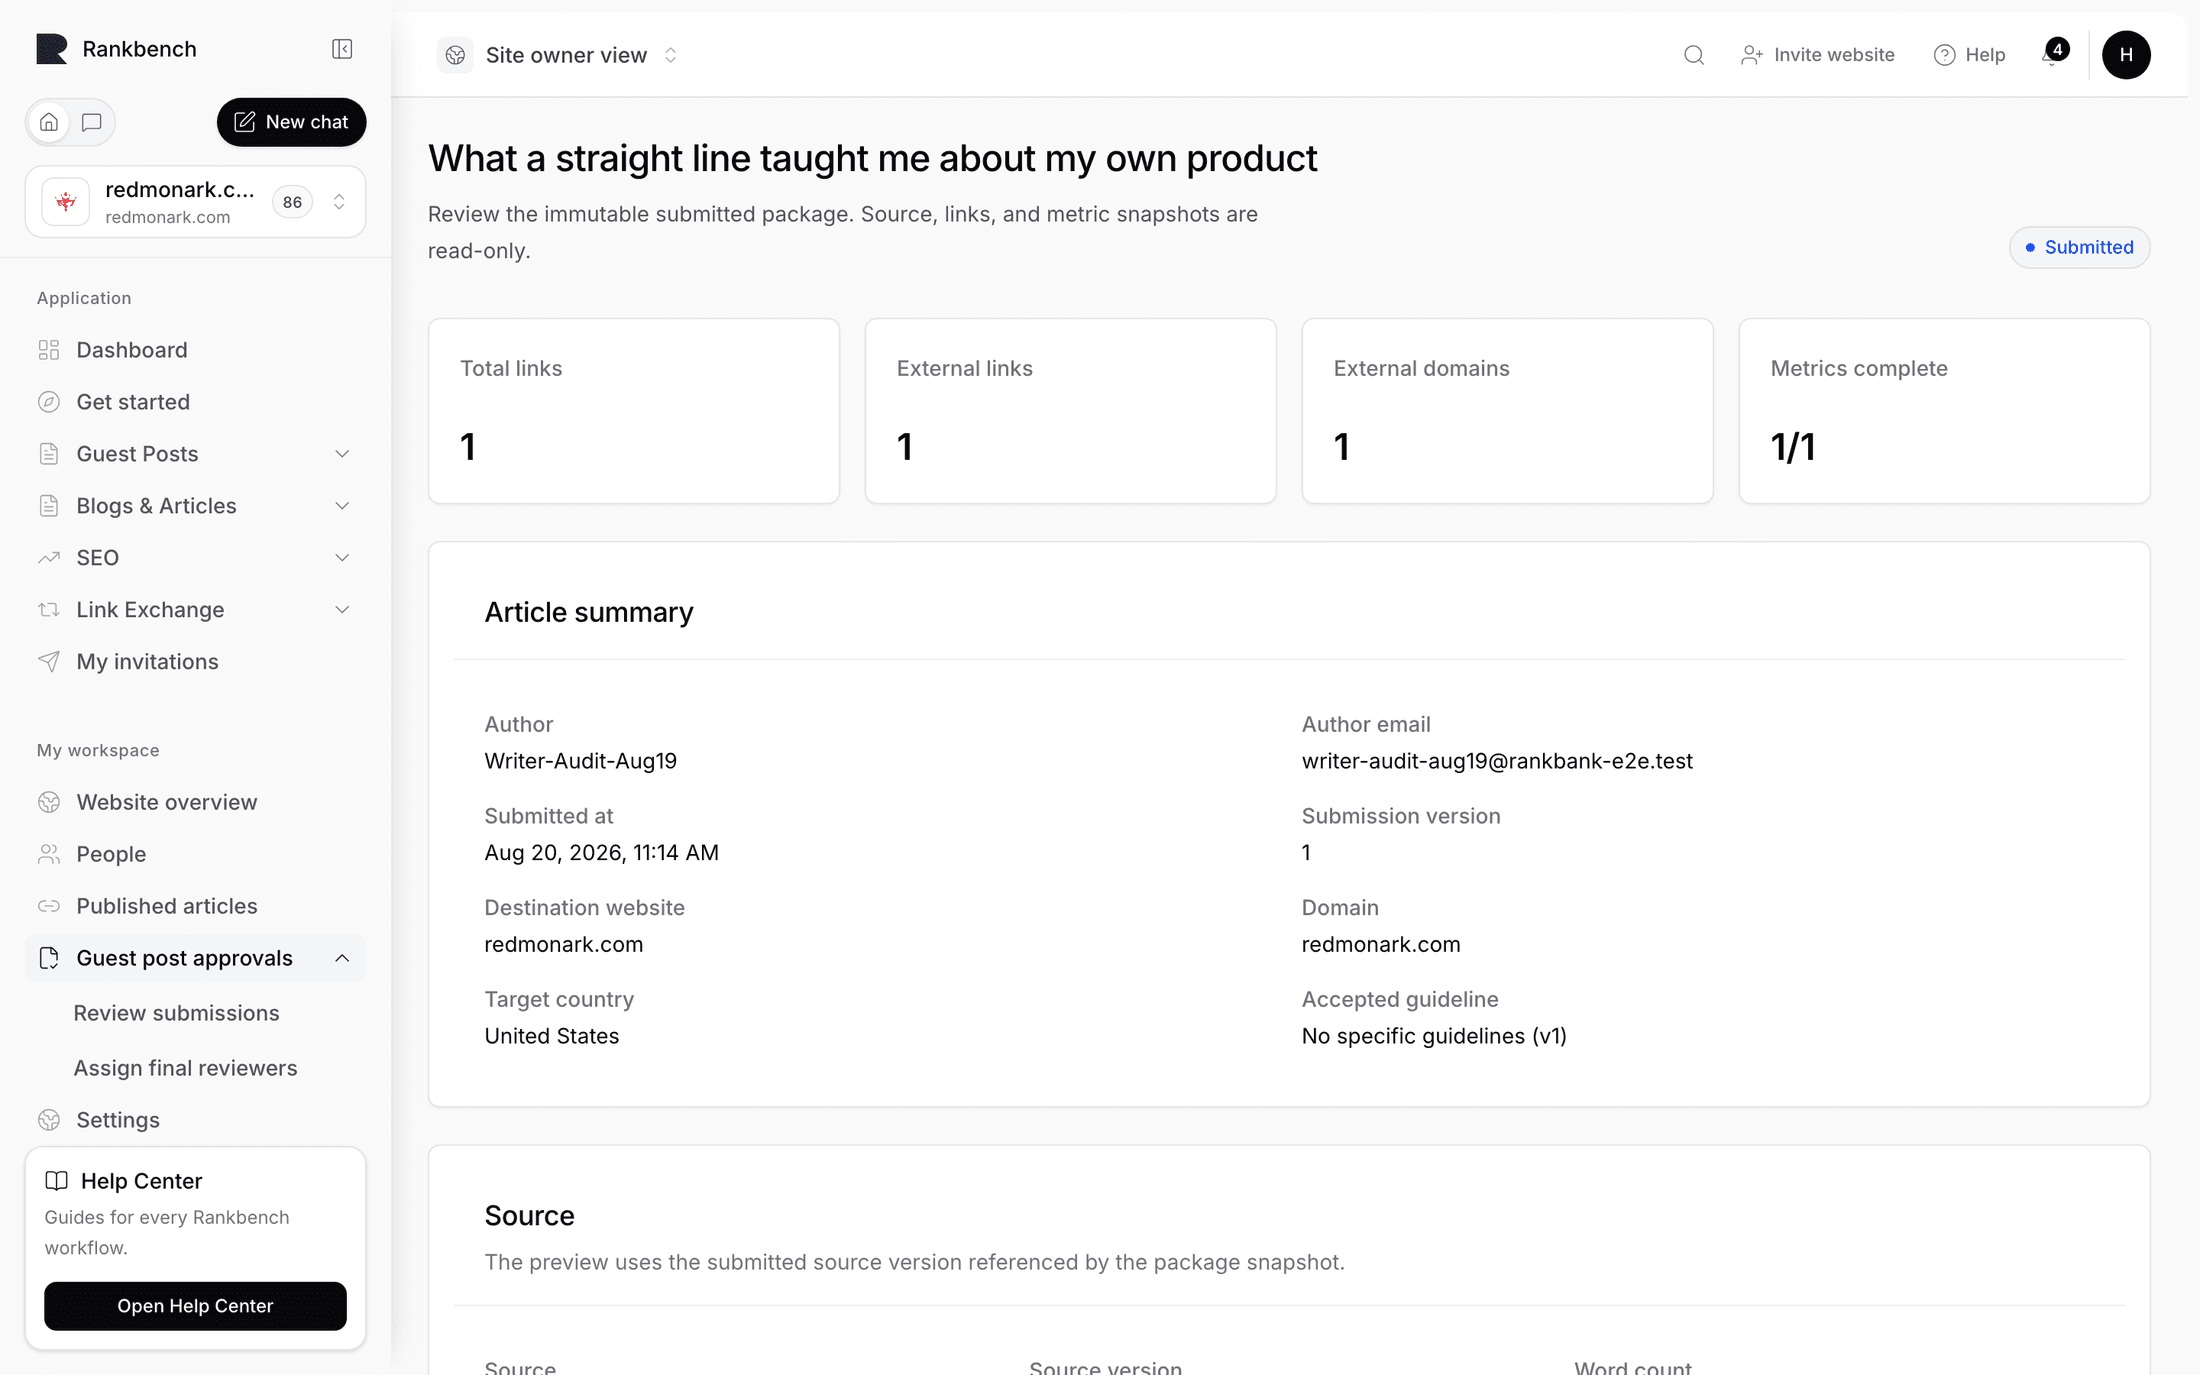
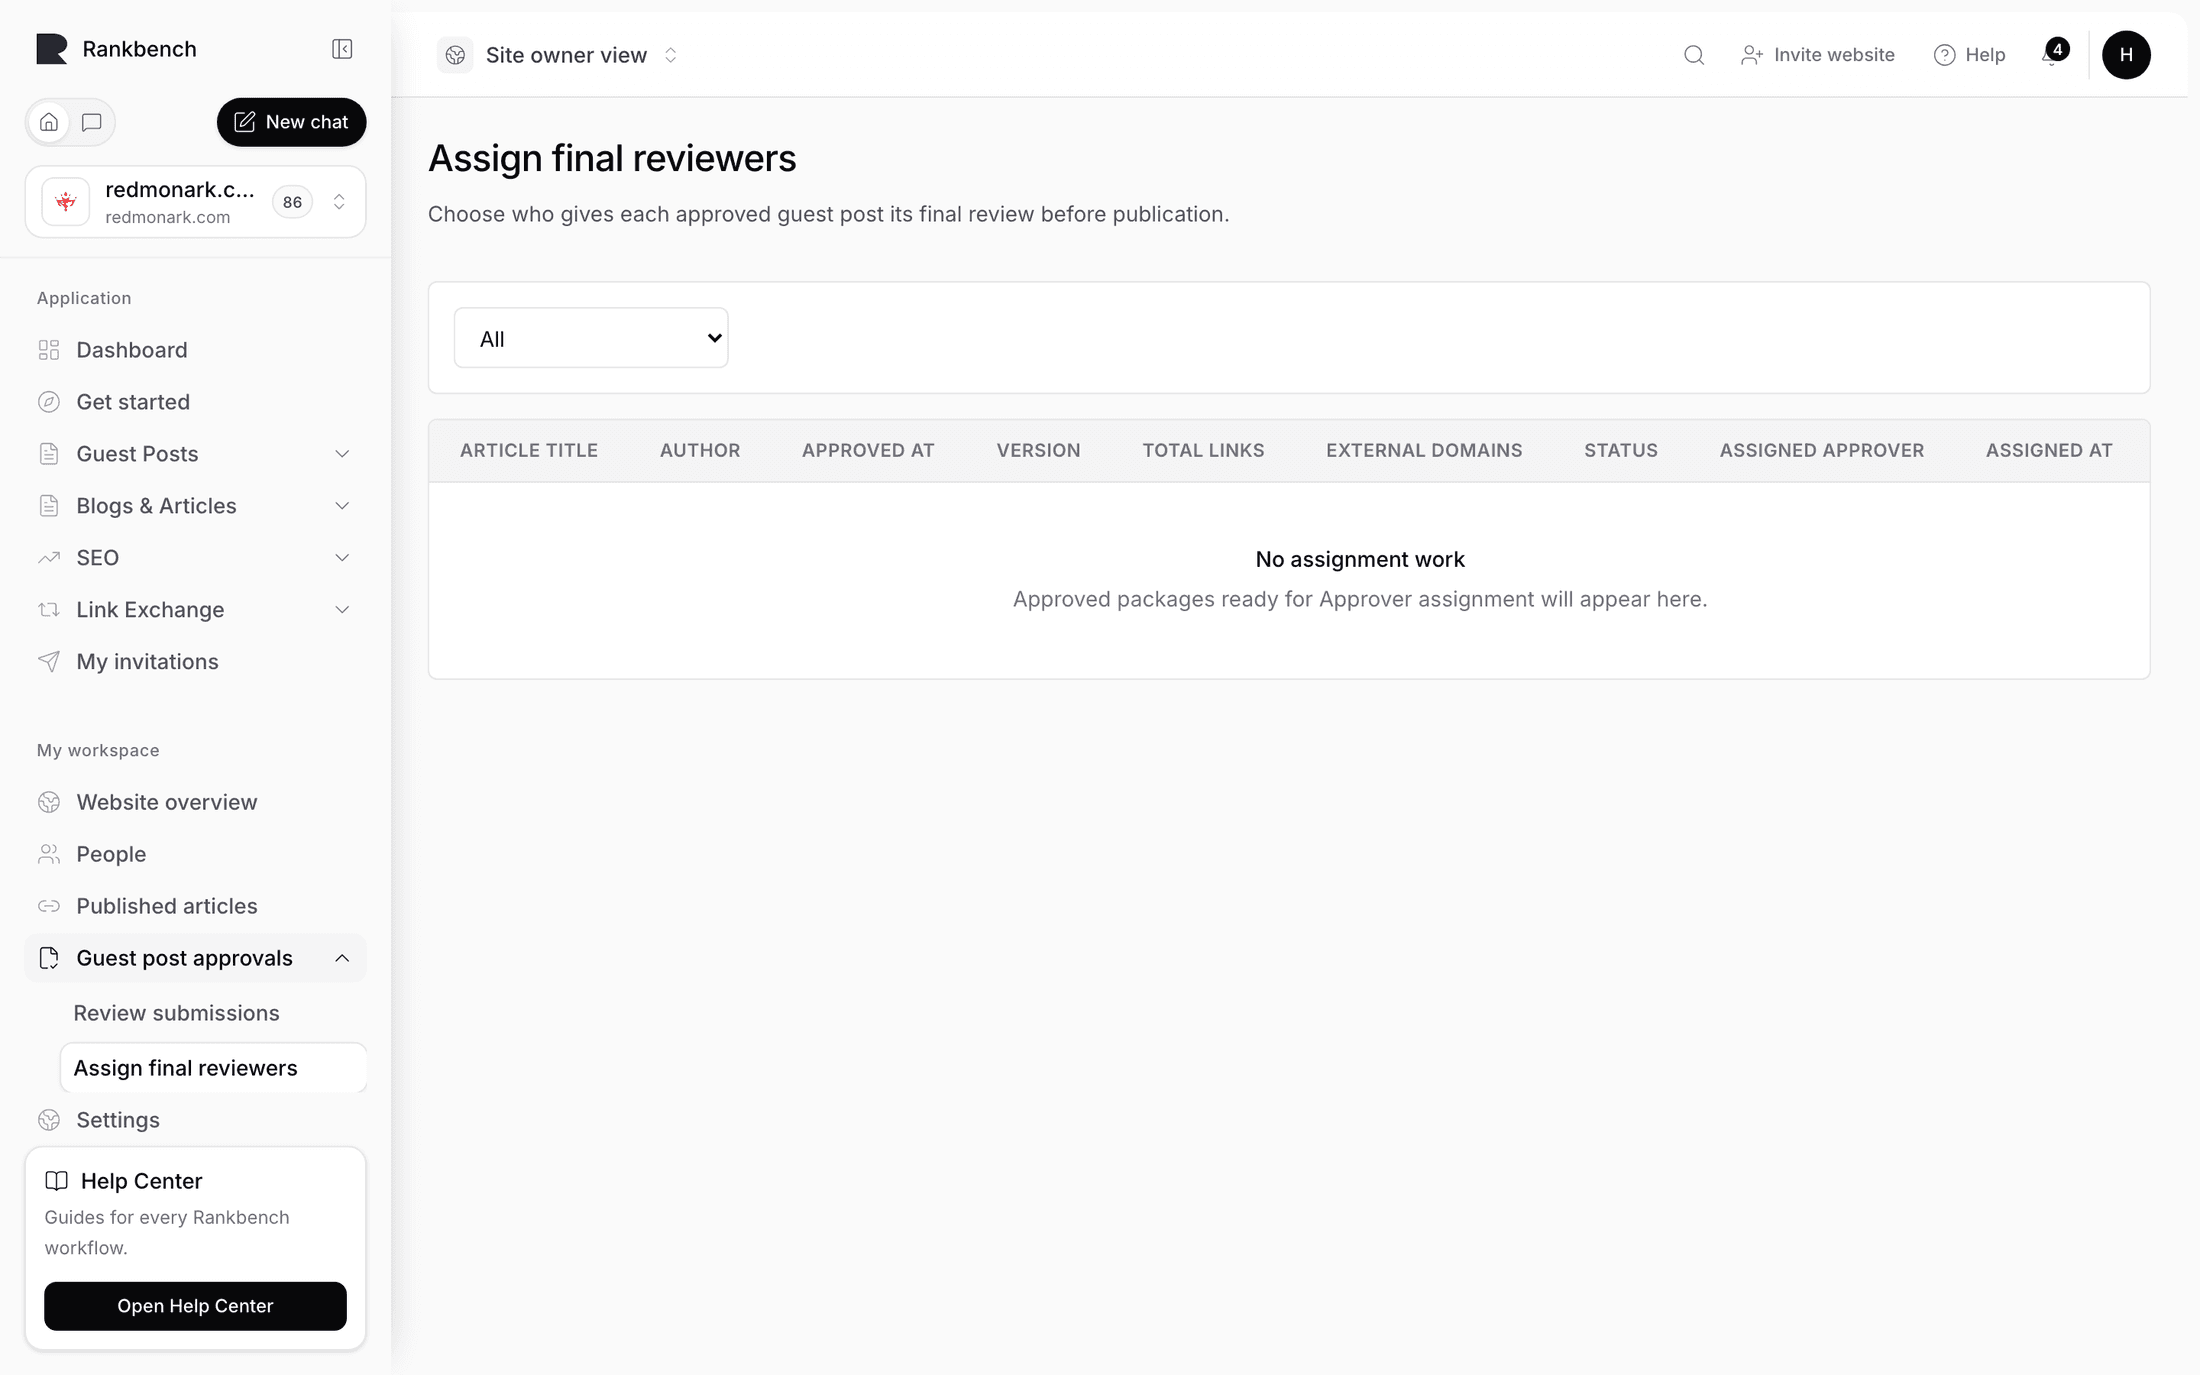
Open Articles under Admin. Every submitted package is here with the author, when it arrived, how many links it contains, how many external domains those links touch, and its status.

Triage from the columns before you read a word. An article with nineteen links across eleven domains is a link-building exercise with prose attached, and you can decide that in three seconds. Filter by review status to see only what's waiting.
Press Review on the one you're taking. The workspace tells you what you're looking at: the immutable submitted package, where the source, links, and metric snapshots are read-only. You're reviewing a frozen version, not a moving draft, which is why your comments can be tied to exact text and still make sense next week.
Check the Article summary first. It names the author, when they submitted, which version this is, the destination website, and, importantly, the accepted guideline with its version number. That's the contract. Judge the article against that version, not against the rules you wish you'd written.
Press Start Review. The status moves to under review, and the author gets a notification telling them it's been picked up with nothing for them to do.
Reviewing properly
Now switch the workspace from Preview mode to Review mode. The article picks up an amber border and a hint: select text or click an image to add a rework comment.
Select a sentence. A modal opens headed "Comment on selected text", and it explains what it creates: an author-visible rework comment tied to the current submitted version.

Two controls in that modal matter.
The type. Overall, Grammar, Seo, Links, Formatting, Images, Brand, or Other. It costs nothing to set and it turns a wall of comments into a sorted list for the author.
The visibility. Author visible goes to the writer. Internal admin never reaches them and never notifies them, deliberately. Use internal comments for things you'd say to a colleague, like "this is the third pitch from this agency this month". Use author-visible for anything you want changed.
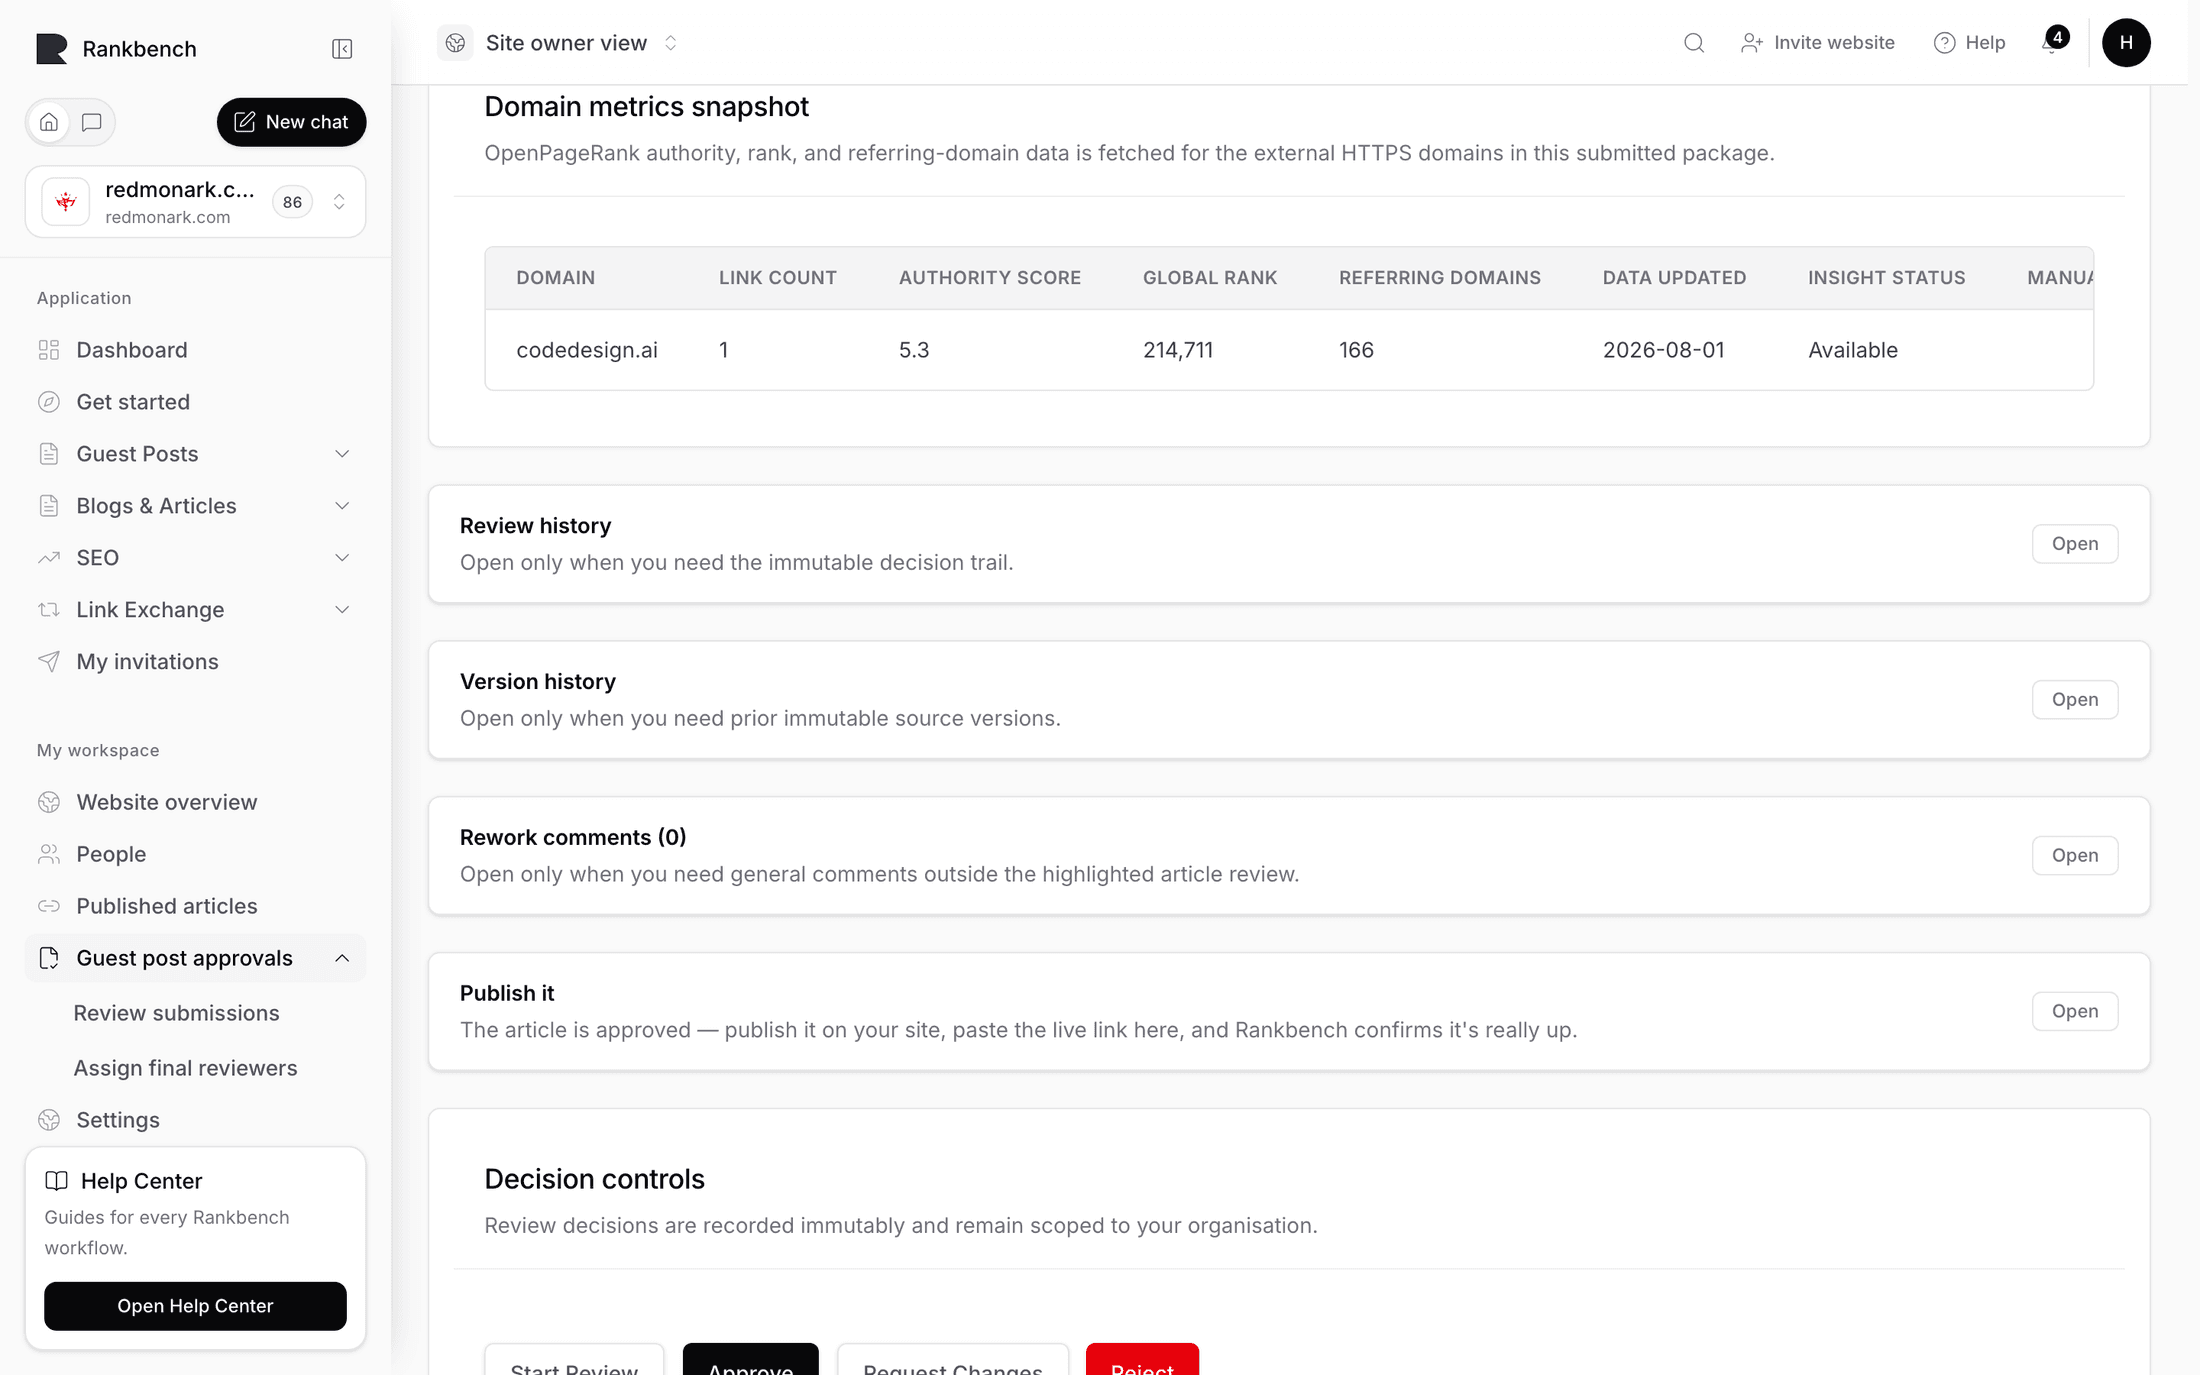
Work through the article leaving comments where they belong. Then check the Link summary tabs, which split every external link into all of them, the passing ones, and the ones needing attention, with a domain metrics snapshot alongside. Read the needs-attention tab carefully. That's where you find the link to a page that redirects three times, or the one pointing at something you'd never link to from your own site.
Then decide. Three decisions, and the rules differ.
Approve takes the latest submitted version and prepares it for publication. A note is optional.
Request Changes needs a note of at least a few words, and its helper text explains why: your note goes to the writer word for word, and editing reopens on their side. It also needs at least one open author-visible comment to exist. The Send back for rework button under the article is disabled until one does, and the product tells you so rather than failing silently.
Reject needs a note too, and it's final for the current review phase.

That comment requirement looks like friction, and it is, on purpose. "Please tighten this up" sends an article back with no information and guarantees a second round. One highlighted paragraph saying what's wrong with it usually gets the fix first time. The helper text under the note field says the same thing from the other end: a sentence or two is plenty, and for line-by-line feedback you highlight text in the preview instead.
Warning
If you left a tab open from yesterday and somebody else already decided, your submit will fail with a message about a conflicting review decision already existing for this submitted package. That's the safety net working. Reload and look at the current state before deciding again.
Reviewing a submission covers the queue, the workspace, and every decision rule.
The rework loop, from your chair
The author gets a notification, revises, and resubmits. You get one telling you revisions were sent and it's ready for another look.
Open it again and check the version number in the Article summary. It will have gone up. Each resubmission creates a new immutable version while the previous ones stay on record under Version history, so you can see exactly what changed between rounds.
Read only what you asked about. This is the discipline that keeps a pipeline from grinding: if you asked for three changes and got three changes, approve it. New objections on round two, about things that were there in round one, are how good authors decide you're not worth writing for.
Then Approve.
Publishing and the live check
Once approved, the Publish it section opens on its own, with a line explaining the sequence: the article is approved, so publish it on your site, paste the live link here, and Rankbank confirms it's really up.

Publish the article on your own CMS the way you publish everything else. Rankbank never posts to your CMS here, which means your templates, your scheduling, and your editorial process stay exactly as they are.
Then press Submit live URL. The modal takes the URL, a publication date, and a public publication note.
Now press Run validation. Rankbank fetches the live page and compares it against the approved version: the links, their anchor text, where they point, and whether the page is indexable.

The results are honest either way. A pass reads "The live page checks out — links verified." A failure reads "The live page didn't pass validation — see the results below", and the results tell you which link was expected and what was actually found.
Failures are usually your own editing pass. Somebody stripped a link, or changed the anchor text to fit the house style, or the page went out with noindex on it. Fix the page and validate again.
A passing check does three things at once: the post flips to Verified live, the author is notified, and the article is filed in the Content Library automatically. That library entry is created exactly once by a passing check and never by hand. Publishing and the live check covers the whole path.
What this gives you in six months
Two things, and both matter more than they sound.
The Content Library holds every article that went live and stayed live, with its live URL, its author, its domain, its link count, and its verification status. It's proof of work, and it's also the fastest way to answer "have we published this person before" and "what did we actually get out of this programme".
The review history on each article is an immutable trail of who decided what and when, with the notes attached. When somebody asks in March why you declined a piece in October, the answer is on the record rather than in somebody's memory.
The Content Library covers what earns a place in it.
Keeping the intake healthy
Two habits keep this from decaying.
Pause with a reason when you need to. If you're behind, set visibility to Paused and write a real Paused reason, something like "We're catching up on a backlog and will reopen in September." Authors see it. It costs you nothing and it stops the queue growing while you're not looking.
Iterate your guidelines by publishing a new version. Every quarter, look at what you declined and why. If you rejected four pieces for the same reason, that reason belongs in the next version of your rules, most likely in the never-accept list. Write the new version, publish it, and the previous one retires. Authors who submitted under the old rules are still judged against the old rules, so you can tighten things without breaking anything in flight.
The intake you want is small and good. The rules are how you get there.
Where to go from here
- Reviewing a submission: the queue, review mode, and every decision rule in detail
- Writing your guidelines: the versioning model and every field on the draft form
- Guest posting on Rankbank: the whole journey in one page, both sides
Still stuck?
Open Rankbank and the page this article describes — most screens explain themselves as you go.