Opening Rankbank0.0s
Getting startedCreating your Rankbank accountAdding your first websiteProving your site is yoursWriter view and Site owner viewHow Rankbank tells you thingsYour dashboardRankbank Pro and billing
Site audit & search growthThe SEO overview, explainedHow Rankbank reads your siteThe site health scoreThe Problems to fix pageEvery problem type, explainedYour fix listFindings: how to read a cardEverything Rankbank looks forThe map of your siteConnecting Google Search ConsoleThe growth planSuggested linksTopics and content ideasAuthority: how much weight your site carriesThe Search traffic pagePast reads and history
Guest postsGuest posting on RankbankSubmitting your first guest postImporting from Google DocsWriting in the Rankbank editorReview & send: the last step before the editorsWhen the editors ask for changesTracking your guest postsFor site owners: opening your site to guest postsFor site owners: writing your guidelinesFor site owners: reviewing a submissionFor site owners: publishing and the live checkThe Content Library
Link exchangeLink swaps on RankbankSetting up your site for swapsPages you shareFinding a site to swap withSending a swap requestReviewing a swap request you receivedAsking a partner for a linkAnswering a link requestWhen the page is published somewhere you can't editHow Rankbank keeps watchThe partner ledger
Content calendarThe content calendarSetting up your calendarWhere the keywords come fromReading the calendarSteering an article before it's writtenReviewing and editing a draftConnecting where it publishesPublishing and what happens nextStyle & settings
TutorialsYour first site audit, from "read my site" to fixes you can ship this weekConnecting Search Console and turning its data into clicksWriting a guest post that gets accepted, the full pathRunning guest posts on your site without letting quality slipYour first link swap, start to finishKeeping your links alive, from wording changes to missing linksA month of content on autopilot, done properly
RankbankHelp center
Open Rankbank →
Getting startedCreating your Rankbank accountAdding your first websiteProving your site is yoursWriter view and Site owner viewHow Rankbank tells you thingsYour dashboardRankbank Pro and billing
Site audit & search growthThe SEO overview, explainedHow Rankbank reads your siteThe site health scoreThe Problems to fix pageEvery problem type, explainedYour fix listFindings: how to read a cardEverything Rankbank looks forThe map of your siteConnecting Google Search ConsoleThe growth planSuggested linksTopics and content ideasAuthority: how much weight your site carriesThe Search traffic pagePast reads and history
Guest postsGuest posting on RankbankSubmitting your first guest postImporting from Google DocsWriting in the Rankbank editorReview & send: the last step before the editorsWhen the editors ask for changesTracking your guest postsFor site owners: opening your site to guest postsFor site owners: writing your guidelinesFor site owners: reviewing a submissionFor site owners: publishing and the live checkThe Content Library
Link exchangeLink swaps on RankbankSetting up your site for swapsPages you shareFinding a site to swap withSending a swap requestReviewing a swap request you receivedAsking a partner for a linkAnswering a link requestWhen the page is published somewhere you can't editHow Rankbank keeps watchThe partner ledger
Content calendarThe content calendarSetting up your calendarWhere the keywords come fromReading the calendarSteering an article before it's writtenReviewing and editing a draftConnecting where it publishesPublishing and what happens nextStyle & settings
TutorialsYour first site audit, from "read my site" to fixes you can ship this weekConnecting Search Console and turning its data into clicksWriting a guest post that gets accepted, the full pathRunning guest posts on your site without letting quality slipYour first link swap, start to finishKeeping your links alive, from wording changes to missing linksA month of content on autopilot, done properly
  1. Help center
  2. /
  3. Tutorials
  4. /
  5. Writing a guest post that gets accepted, the full path

Writing a guest post that gets accepted, the full path

Updated August 24, 2026 · 13 min read


Somebody sent you a link and said "we take guest posts, pitch us something". You have a half-written Google Doc and a vague memory that guest posting involves a lot of chasing.

This is the whole path, done properly, once. You'll start from that shared link with no account, and finish with an article published on somebody else's site, its link verified by Rankbank, and a row in your Content Library that proves it. Along the way you'll hit a change request, because you usually do, and handle it in about ten minutes.

Everything here is the writer's side. If you're the one receiving submissions, running guest posts on your site is your version.

What you'll have by the end

  • An account, and an article submitted to a real destination site
  • A draft shaped to that site's published rules before you wrote a word of it
  • One round of editor feedback answered and resubmitted cleanly
  • A verified live URL and a Content Library entry you can show people

Arriving from a link

The link you were sent looks like rankbank.codedesign.ai/submit/their-site. Open it and you get a public page, no login required.

The public submission landing page showing the site name, its domain, target country, categories, and a status line reading Accepting Guest Posts
The public landing page. Everything you need to decide whether to bother is on it.

Read the info card before anything else. It names the site, its root domain, its target country, and its categories, plus a status line reading either "Accepting Guest Posts" or "Not currently accepting submissions". Underneath is a guidelines teaser with a version number and a promise: you'll see the site's rules right before you submit, so there are no surprises.

Press Create a free account. If you already have one, I already have one — sign in does the same job. Either way you come straight back here with this site already selected, which the page tells you before you go: "After you sign in, you'll come straight back here with {org} already selected."

Signing up as a guest author means signing up with no organisation. That's a normal, complete account. You'll see the writing tools, your own articles, and nothing else, and the sidebar will label you Guest Author. Creating your Rankbank account covers the wizard, and writer view and site owner view explains the switch in the header if you ever add a site of your own.

If instead you hit "This publisher is invite-only" or "Submissions are paused", that's the site telling you it isn't open right now. Ask your contact there for an invitation, or come back later.

Read the rules before you write

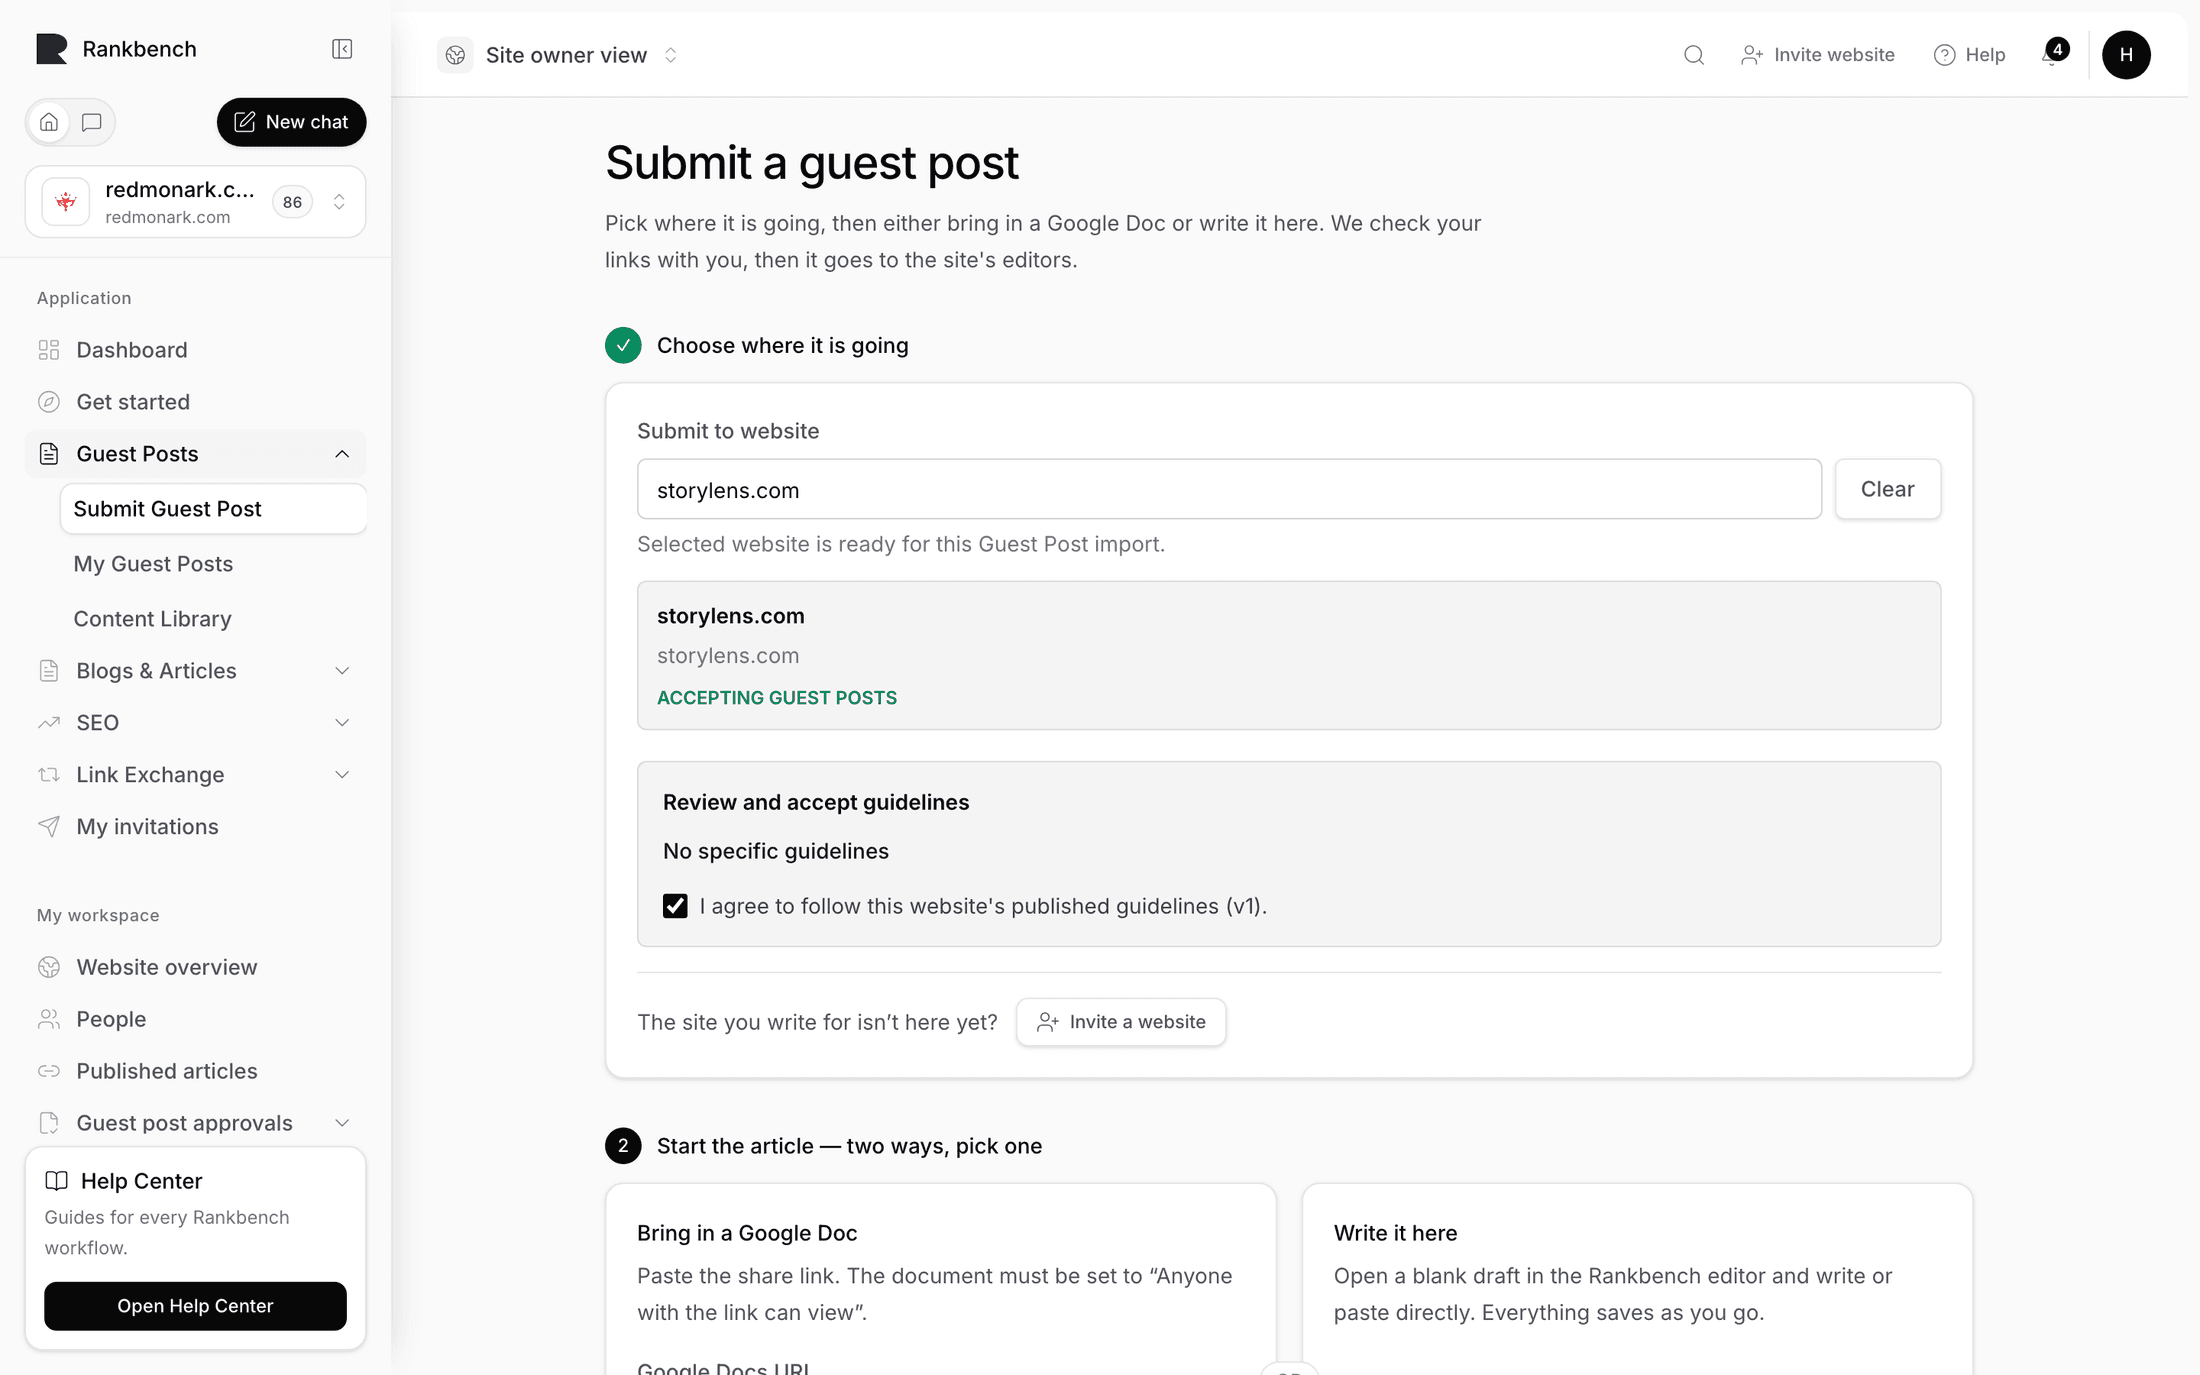
You land on Submit a guest post with the destination already filled in. Step 1 is done. Under it sits a gate headed Review and accept guidelines, and this is the most valuable thirty seconds in the whole process.

Press Read guidelines. A modal opens with the site's published version: the topics they accept, what the article itself must include, their rules for links, and a minimum word count.

The guidelines modal listing accepted topics, content requirements, link rules and a minimum word count
The rules that apply to your submission, pinned to a version number.

That version number matters. Published guideline versions are never edited. If the site changes its rules next month, they write a new version, and your submission is still judged against the one you accepted. Nobody moves the goalposts halfway through.

Note

Depending on how you arrived, you may see a shorter summary rather than the full rules. If the modal is thin and the site clearly has detailed guidelines, ask your contact to send them across. What you accept is still pinned to a version either way.

Now go and read your draft against those rules, honestly. In my experience three things reject more guest posts than bad writing.

The topic. If their accepted topics list says "operations and finance" and your piece is about hiring, it will be declined no matter how good it is. Sites that publish a "topics you never accept" list are doing you an enormous favour, so believe it.

The links. Most guest authors are here for the link back to their own site, and every site knows that. Their rules will usually cap the number of links to other sites, say whether links must be contextual, and set an anchor text policy. Two links, one to the most relevant page on your site, in a sentence where it genuinely helps the reader, gets through review far more often than five.

The length. If it says a minimum of 1,200 words and your draft is 700, you are not close. Sites set minimums because thin posts are the ones that get them into trouble.

Adjust the draft first. Then tick the agreement checkbox, which reads either "I have read and understood the published guidelines for this website and agree to follow them" or, for sites with nothing published, the general editorial standards version.

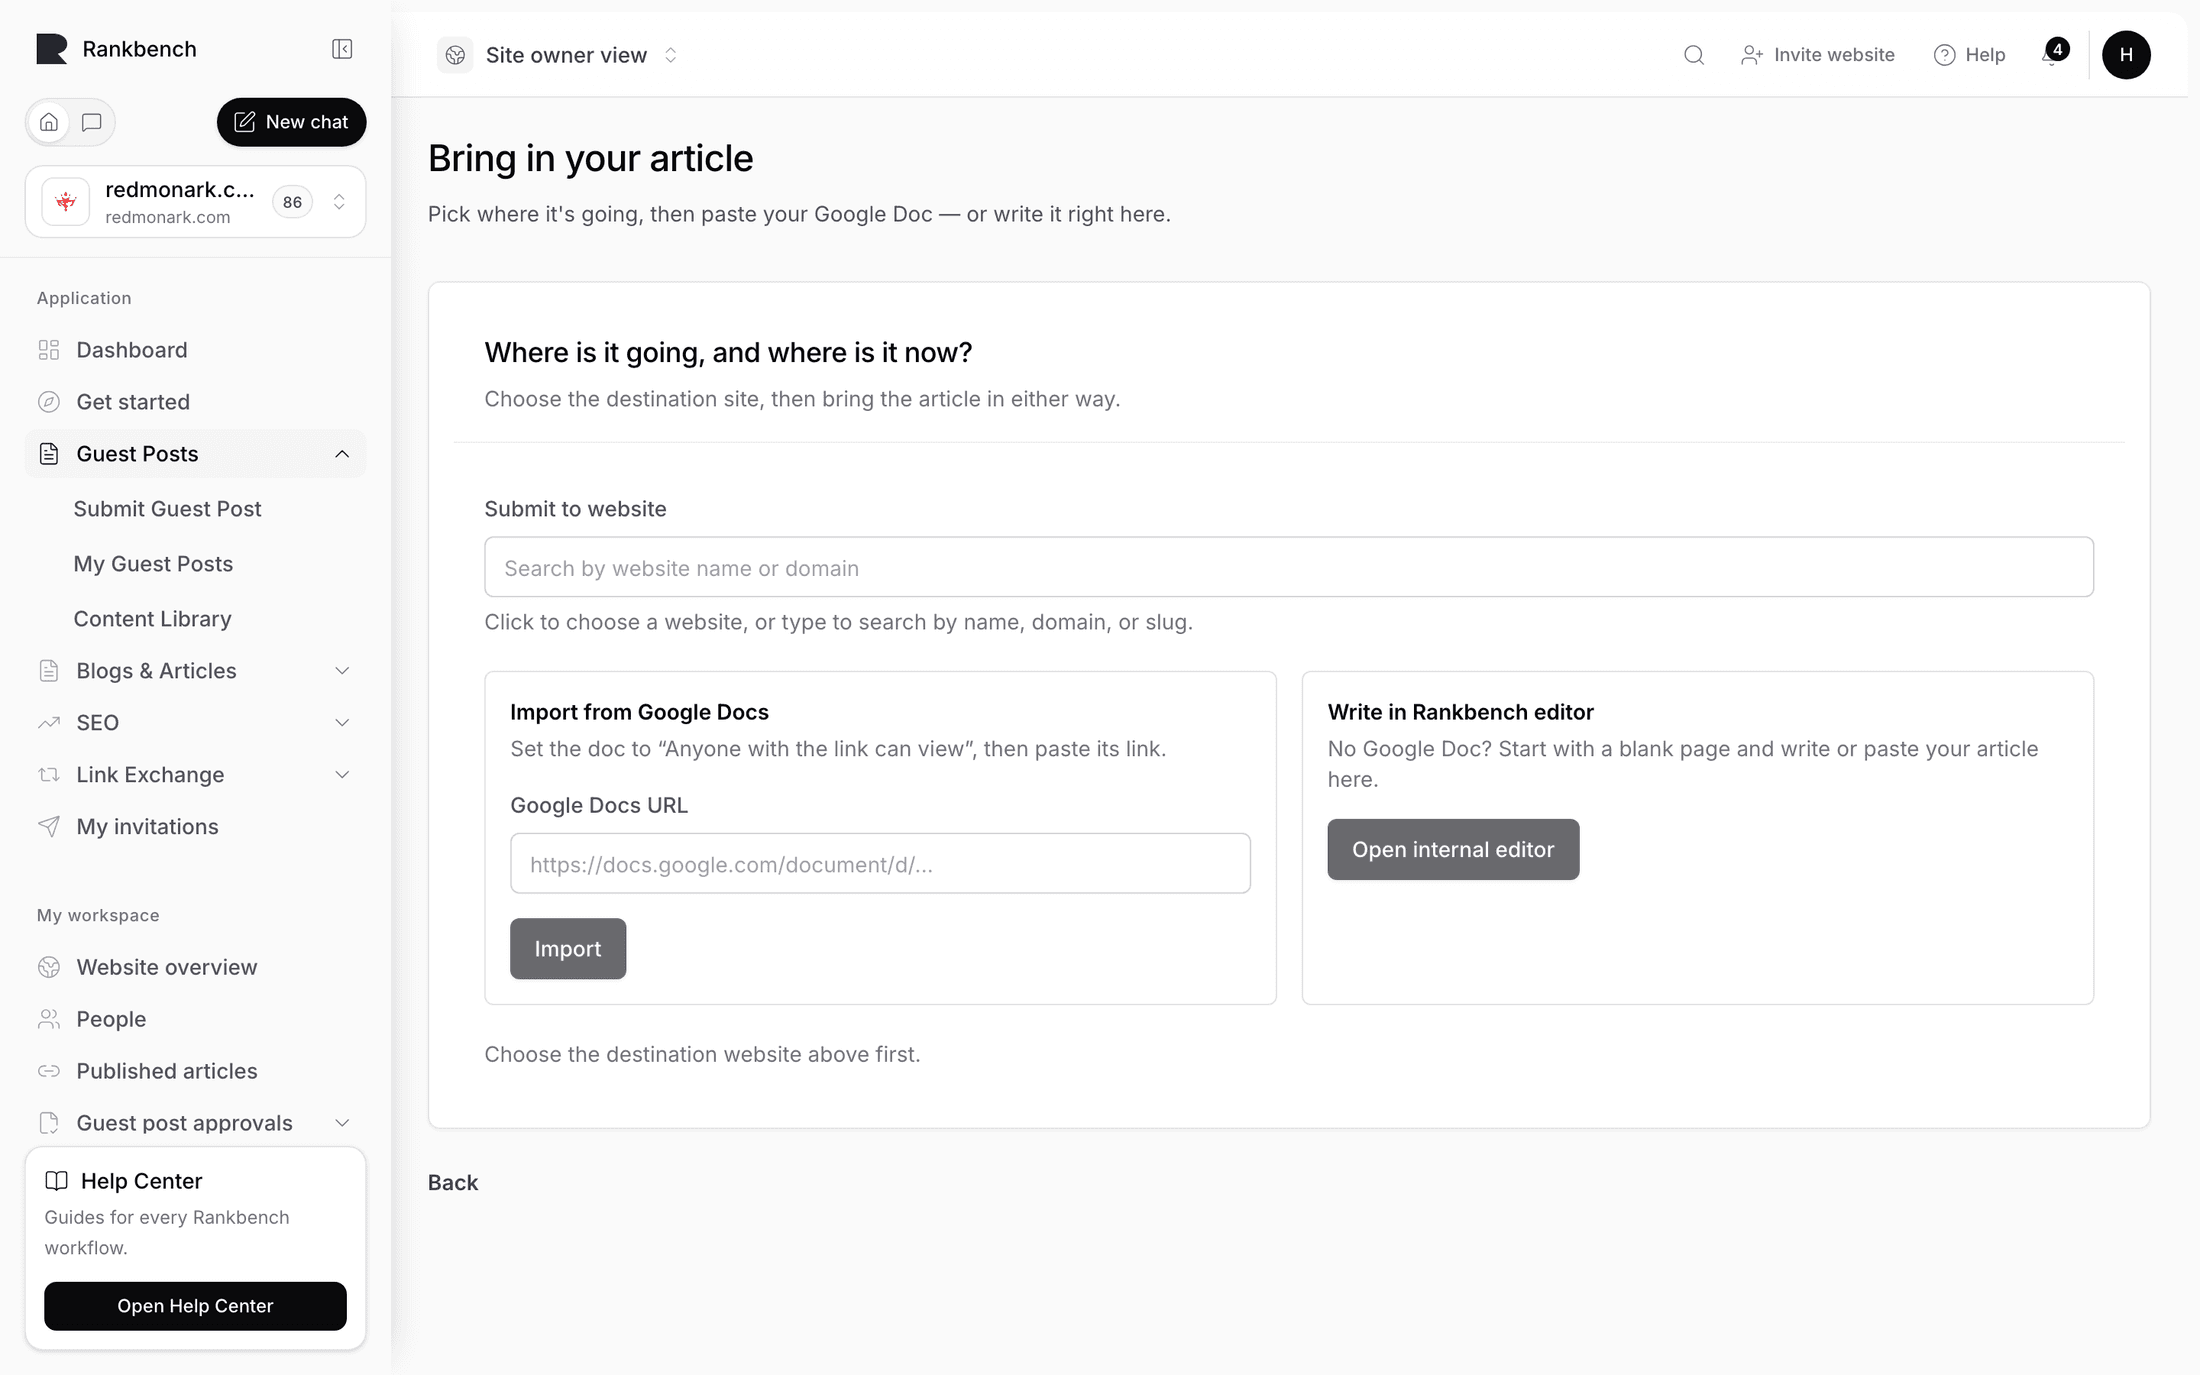
Bringing the article in

Step 2 unlocks: Start the article — two ways, pick one. Import a Google Doc, or open the Rankbank editor and write here.

Step two of the intake showing the Bring in a Google Doc panel and the Write it here panel side by side
Two routes, and the one you pick decides how you'll resubmit later.

Pick deliberately, because it changes how revisions work. Google Doc articles get revised in the doc and re-imported. Editor articles get revised in Rankbank. Neither is better. If you already write in Docs and your editor leaves comments there, stay in Docs.

For the doc route there's exactly one requirement, and it's the thing that trips everyone: the document must be set to Anyone with the link can view. In Google Docs, press Share, open the general access dropdown, change "Restricted" to "Anyone with the link", leave the role as Viewer, and copy the link.

Paste it into the Google Docs URL field and press Import document. Your headings come across, mapped down so nothing is deeper than a subheading, and the doc's own title line is recognised rather than duplicated in the body.

If it fails, you land on a retry screen with a banner reading "That import didn't work" and the reason. Ninety percent of the time the sharing setting is the reason. Fix it, paste again, done. Importing from Google Docs covers the other cases.

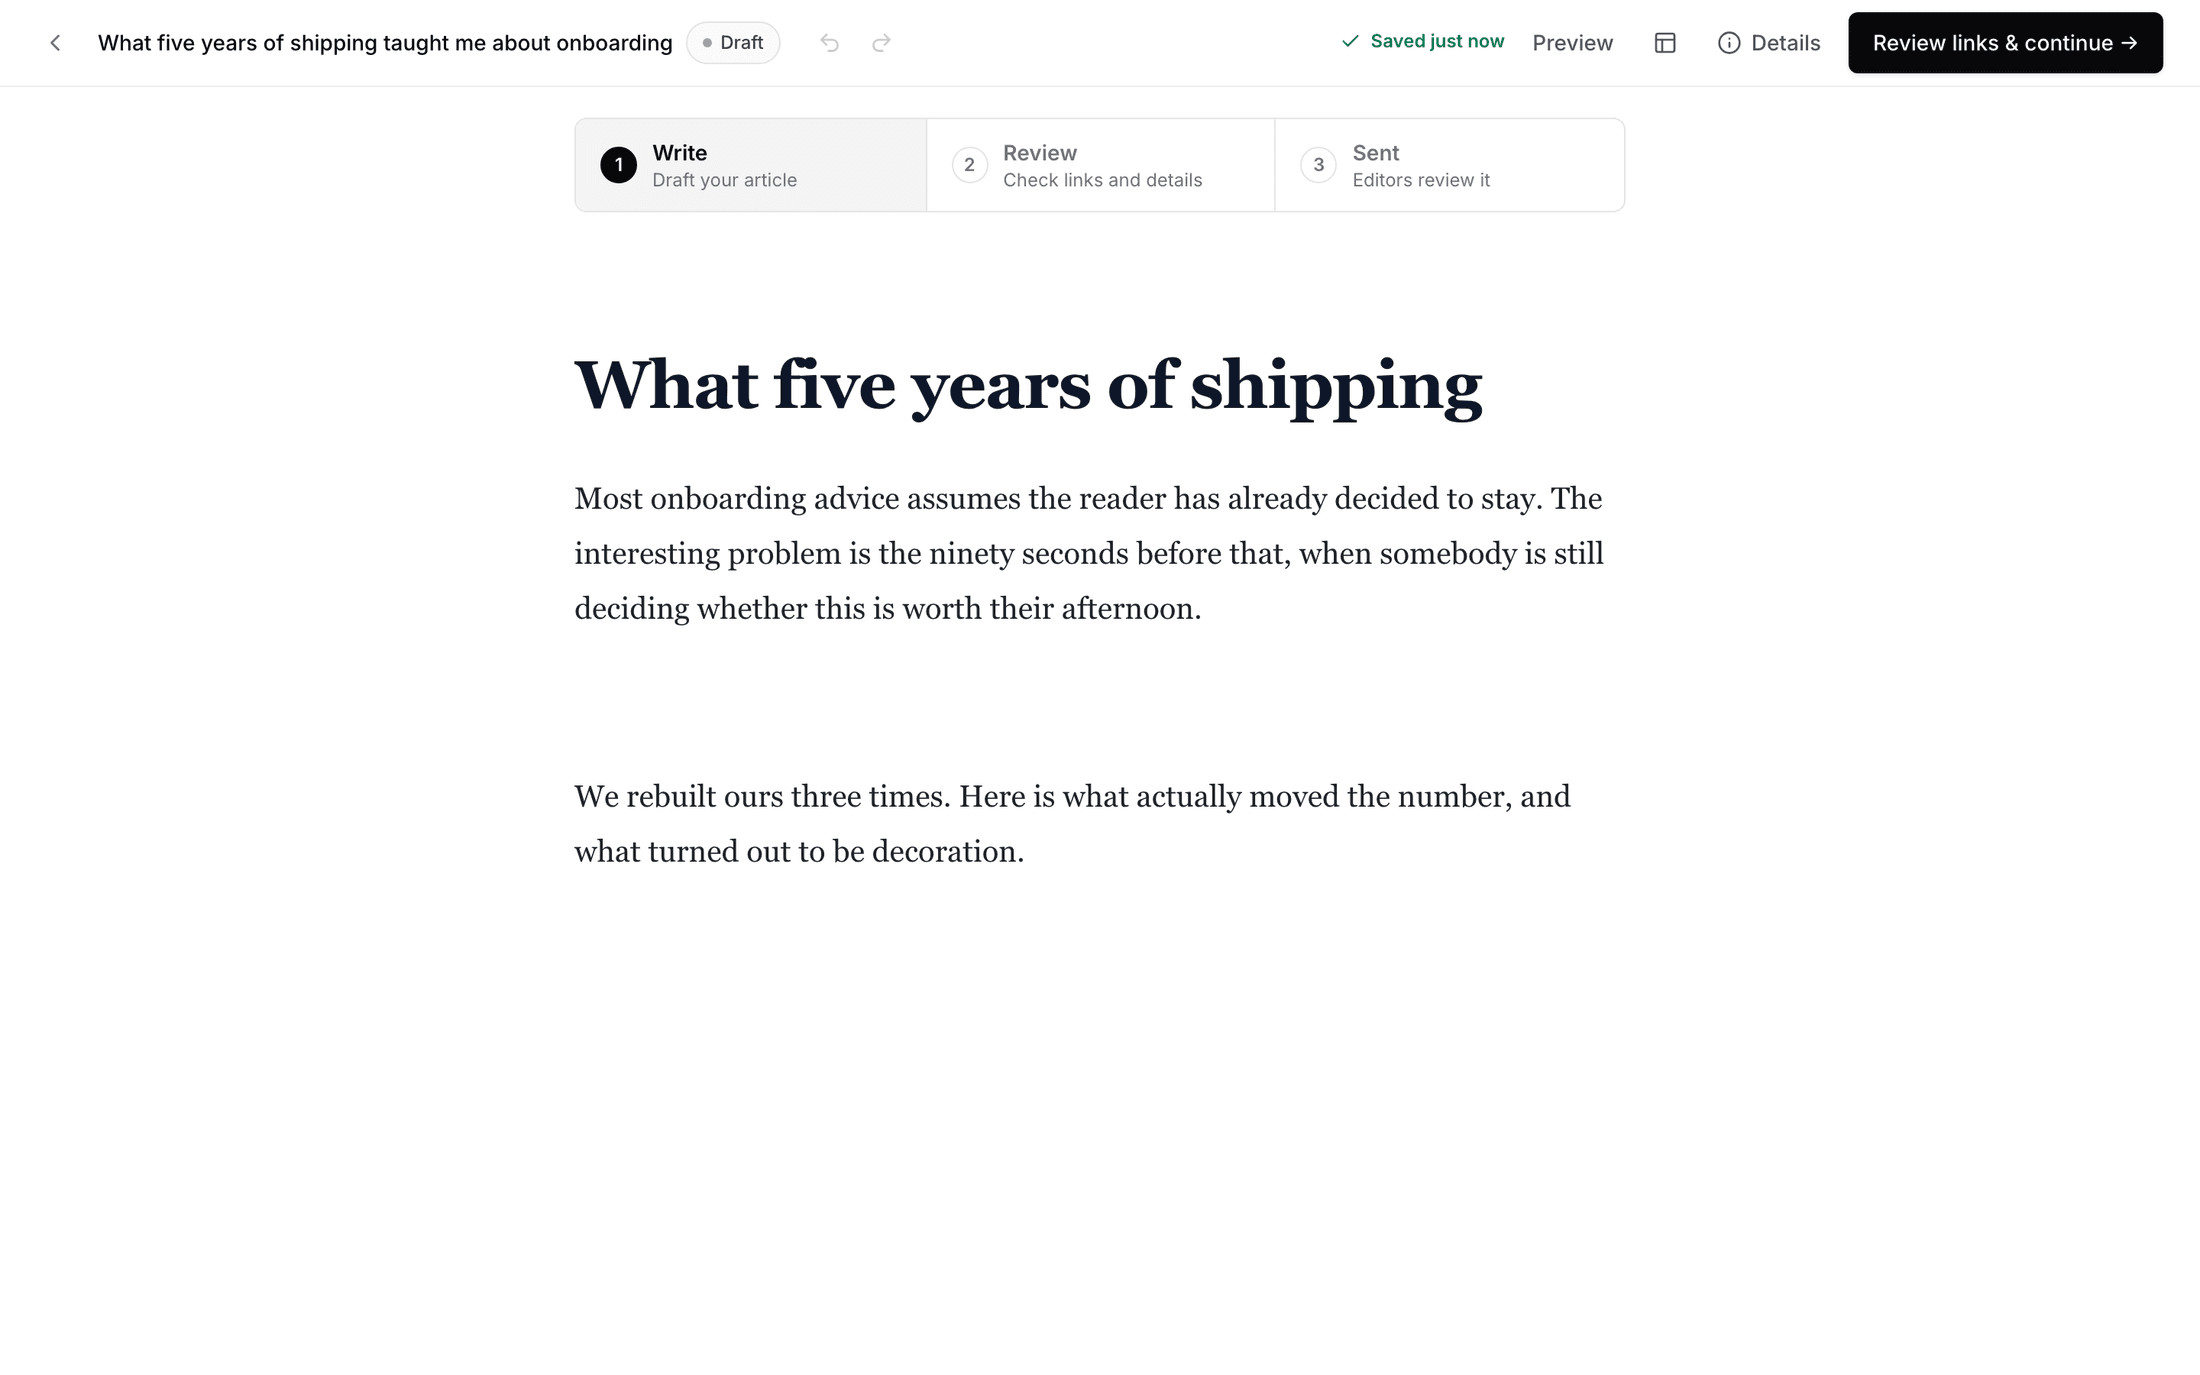
Either route lands you in the same place: the full-screen editor.

The pre-flight

The editor is where most writers hit Send too early. Spend ten minutes here instead and your acceptance rate changes noticeably.

Switch to the Workspace layout with Show side panels, or open the Details drawer on a narrower screen. Seven panels, and three of them are a checklist.

The Rankbank editor in workspace layout with the side panels open, showing the document outline, the site's rules and the SEO checks
The side panels turn the editor into a pre-flight check rather than just a text box.

The site's rules repeats their topics, link rules, and image requirements right next to your text. Read your intro against it one more time.

SEO gives you title length in characters, word count, heading count, images missing alt text, and external links. Not a score, just facts. Fix the ones that are obviously wrong: a title that runs past sixty characters gets cut off in results, images without alt text are a small unforced error, and a piece with no subheadings is hard to read on a phone.

Links and metrics counts your links and groups them by site, showing a pill per domain. This is where you see, plainly, that you linked to your own site four times. Their rules probably said two.

Submission readiness is the one that decides. It says either "Ready to send" with "Everything the destination site needs is in place", or "Not ready yet" with the specific reason.

The submission readiness panel showing Ready to send
The readiness panel names what's missing rather than just refusing.

A few mechanics worth knowing while you work. Autosave runs about a second after you stop typing, and the badge in the top bar tells you where you are: Saved, Unsaved changes, Saving..., or Save failed. A blank title blocks autosave entirely, so name the thing first. Links accept http, https, mailto and tel only. Images come in by public HTTPS URL through the + menu on an empty line, or from your imported doc. There is no upload button, and there is no AI assistance in this editor. It's you and the text.

Writing in the Rankbank editor is the full tour, including the selection bubble menu and the layout options.

When readiness says you're good, press Next: review & send →.

Reading your own link table like an editor

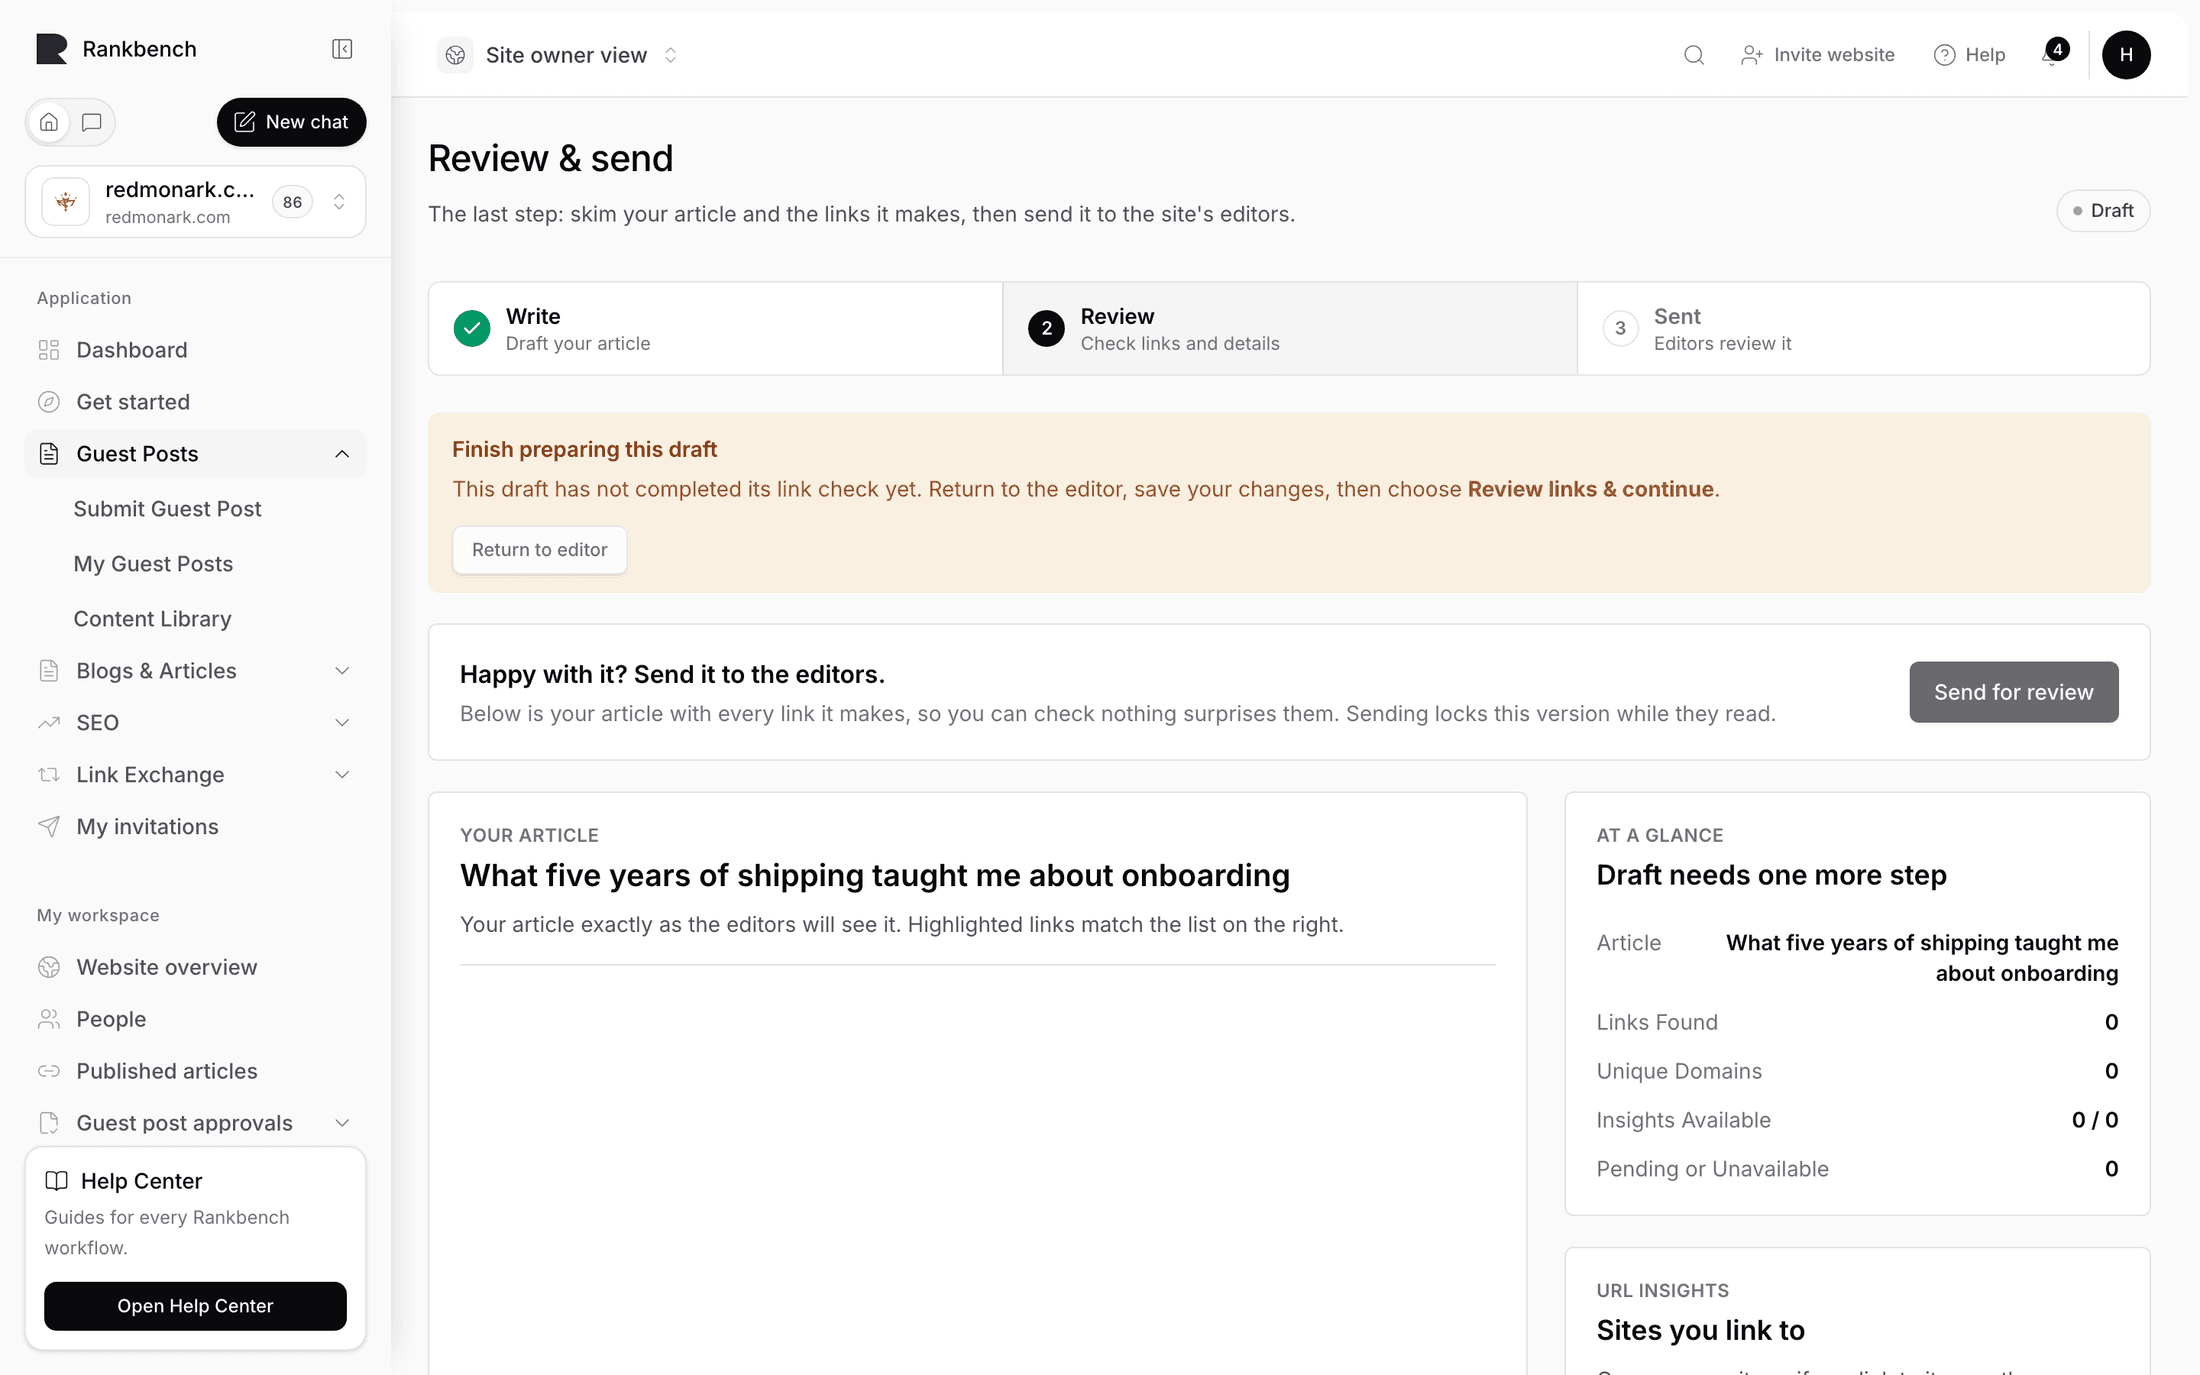
Review & send shows your article exactly as the editors will see it, with every outbound link turned into a chip. Click a chip and it jumps to that site's row on the right.

The Review and send screen with the article preview on the left, link chips highlighted, and the Sites you link to table on the right
Your article and every link it makes, side by side.

Under Sites you link to there's one row per site, with the number of times you link to it, an Authority Score, a Global Rank, Referring Domains, when the data was last updated, and a status. The page states its own position clearly: "The numbers are context, not a gate: missing data never blocks your submission."

Believe that. A domain showing "No public data" will not stop you sending. Nobody types metrics anywhere in this flow, and there is no step where you're asked to.

What you should do with the table is read it the way the editor will. Three questions.

Is every link intentional? Chips make stray links from a copy-paste obvious.

Is the balance reasonable? If your own domain is the only row with an occurrence count above one, that's what the reviewer will notice first.

Would you publish these links on your own site? If one of them points at something thin or promotional, cut it. You're asking somebody to vouch for it.

Then press Send for review. A dialog confirms, naming the article and how many sites it links to, and telling you what sending does: "Once sent, this version is locked while they read it."

The confirmation dialog asking Send it to the editors, with Send it and Not yet buttons
The confirmation names the article and the number of sites it links to.

Locked means read-only. If you open the editor now you'll see "This version is locked while the editors read it. You'll be able to edit again if they ask for changes." That's a feature. It means the reviewer and you are looking at the same words, and nobody is reviewing a draft that moved.

While they read

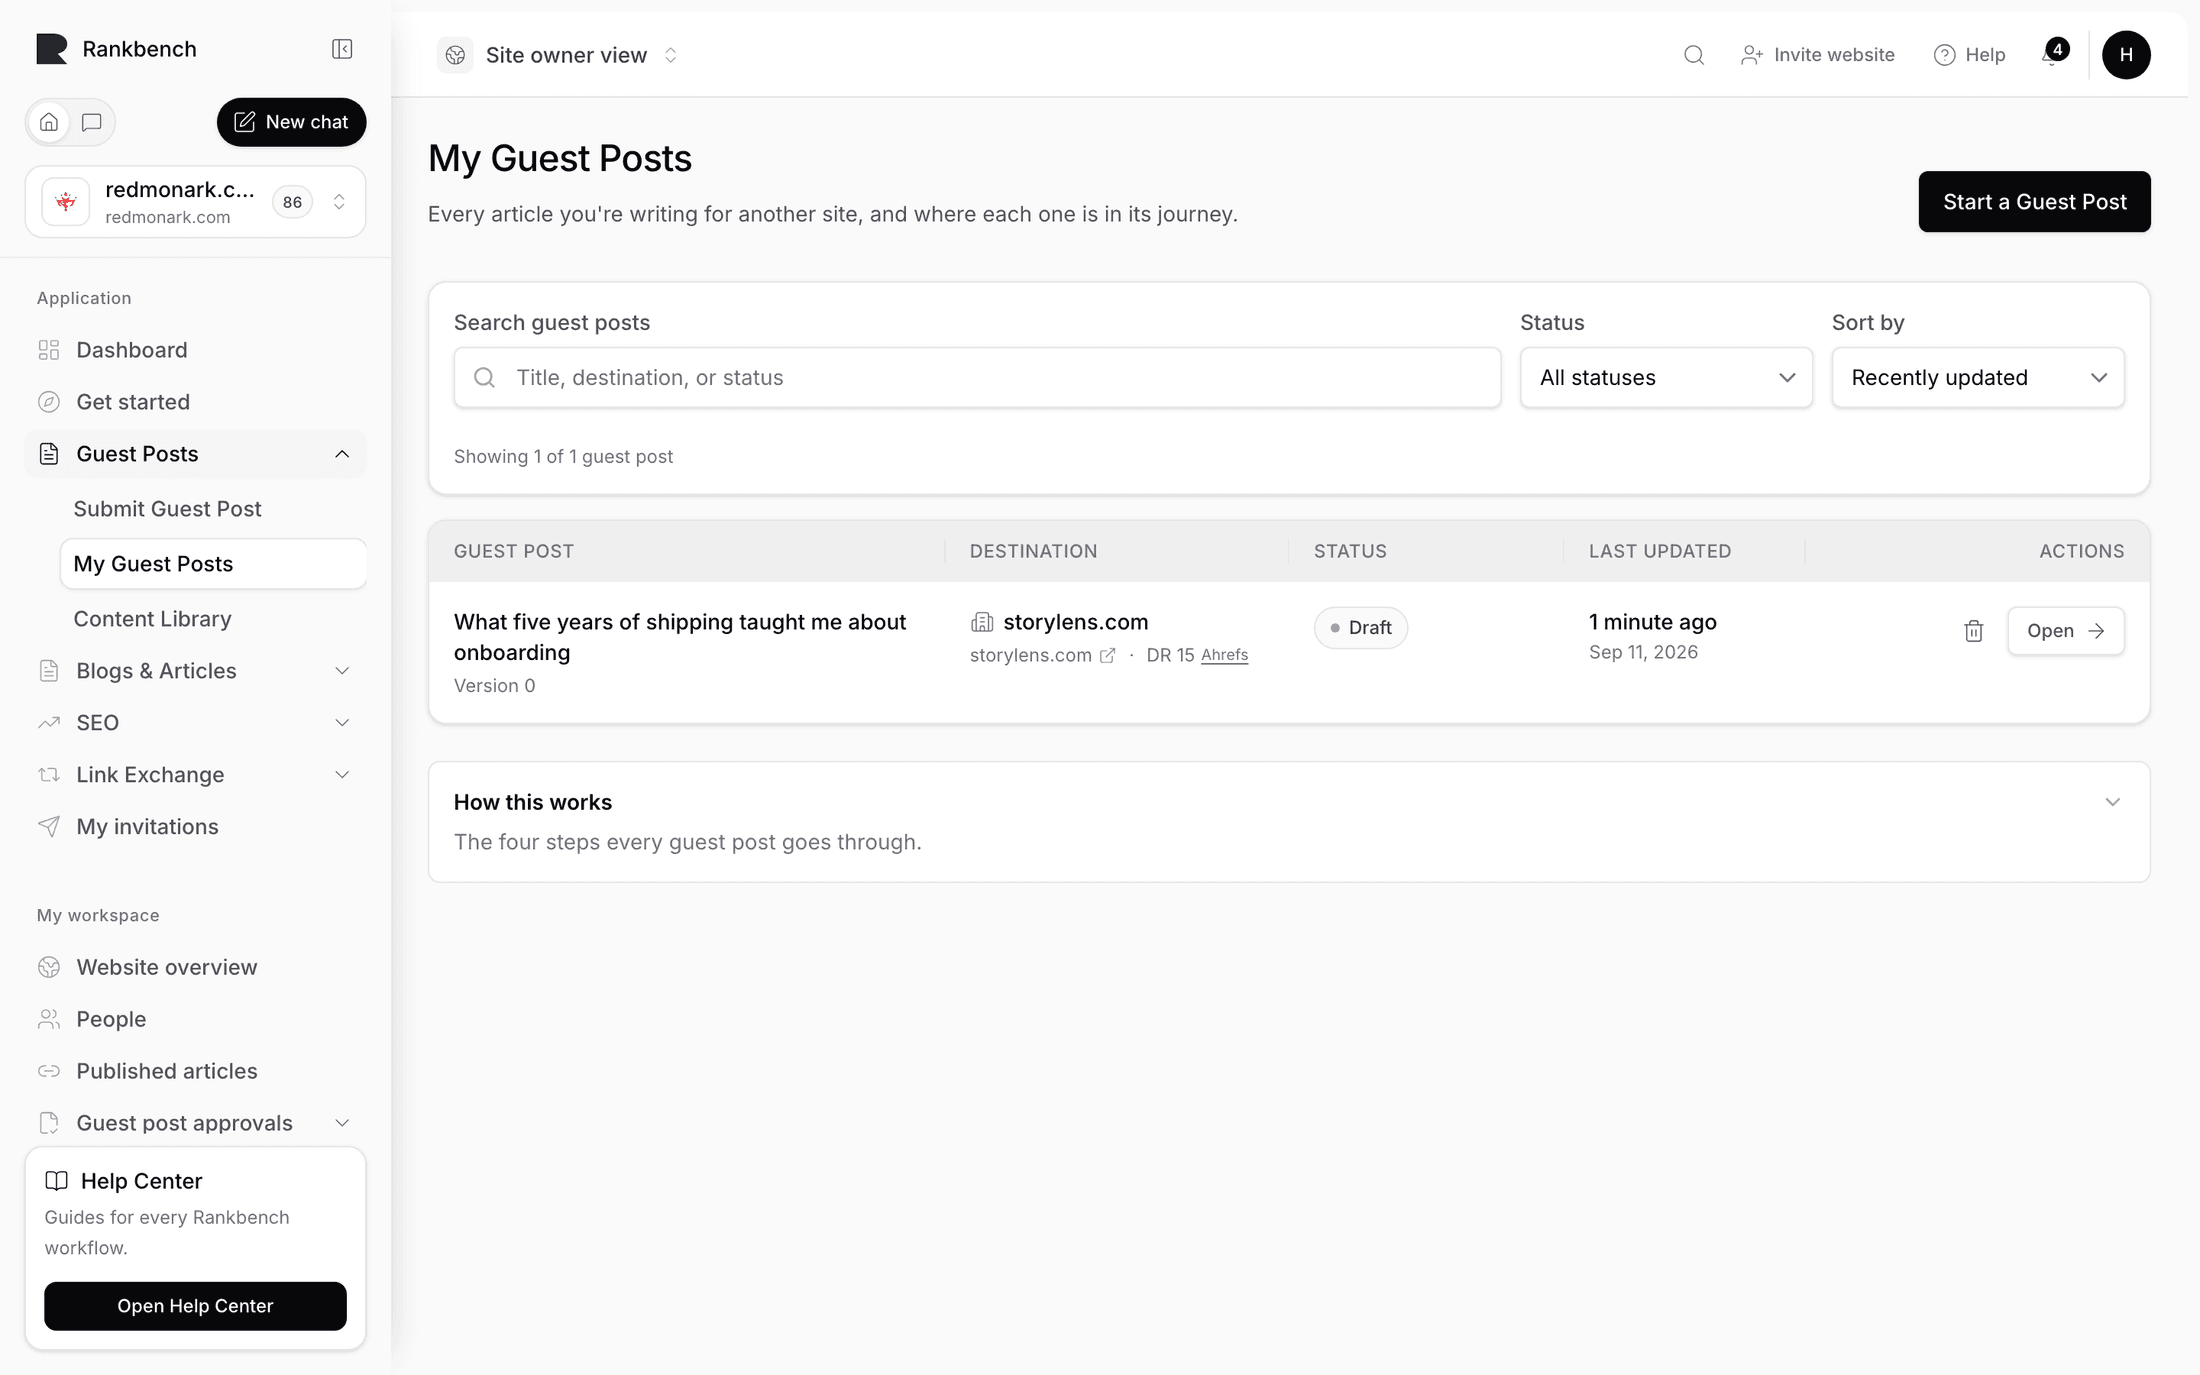
Watch My Guest Posts. Every article you're writing for another site is there with its status, and the statuses run in journey order: Submitted, then Under review once somebody picks it up, then a decision.

You'll get in-app notifications at each step, through the bell in the header. Rankbank sends no email of any kind, so if you're waiting for something to land in your inbox you'll wait forever. Check the bell. How Rankbank tells you things covers the grouping and the priorities.

Tracking your guest posts lists every status you can meet and what each one means.

The change request

Most first submissions come back. A notification arrives titled "Changes were requested" with a one-line body: read their notes, revise the draft, and send it back.

Open the article. Their feedback is in Feedback from the editors, and comments can be tied to your exact text or to a specific image, so you usually know precisely which sentence they mean.

A change request comment quoting a passage from the article, with Reply and Mark Addressed buttons
Comments quote the passage they're about, so there's no guessing which paragraph.

Handle it in this order.

Read all the comments before changing anything. Editors often make one point three times in different places.

Reply to anything you disagree with, before you rewrite it. A short reply explaining why a link is relevant gets a better outcome than silently deleting it and hoping. Replies are an author-visible conversation, so they see what you write.

Make the changes. If your article came from a Google Doc, edit the same doc, then press Resubmit my updated doc on the article page. The amber card says it plainly: make the changes in the same Google Doc, then resubmit. If you wrote in the editor, editing has reopened, so make the changes there, then Next: review & send → and Send for review again.

Then press Mark Addressed on each comment you handled. It's a small courtesy that saves the reviewer from re-reading everything to find out what you did.

Each resubmission creates a new version. The old ones stay on record and the article keeps one identity throughout, so nobody loses track of what was reviewed when. When the editors ask for changes covers both resubmit paths in detail.

Warning

Don't start a fresh submission to fix a change request. It breaks the thread, loses the version history, and lands in the reviewer's queue as a duplicate. Always resubmit the same article.

Approved, published, verified

Approval arrives as a notification: the site accepted it, and they'll take it from here and publish it.

What happens next is on their side. They publish the article on their own CMS, then submit the live URL in Rankbank and run a validation check. Rankbank fetches the live page and compares it against the approved version: the links, the anchor text, where they point, and whether the page is indexable.

When it passes, your article page shows a banner: "It's live!" with confirmation that the guest post is published on the destination site and will be in your Content Library from now on.

An article page showing the It's live banner and the Where it's been panel with the live URL and latest validation
Verified live. The Where it's been panel keeps the versions, the live URL, and every check.

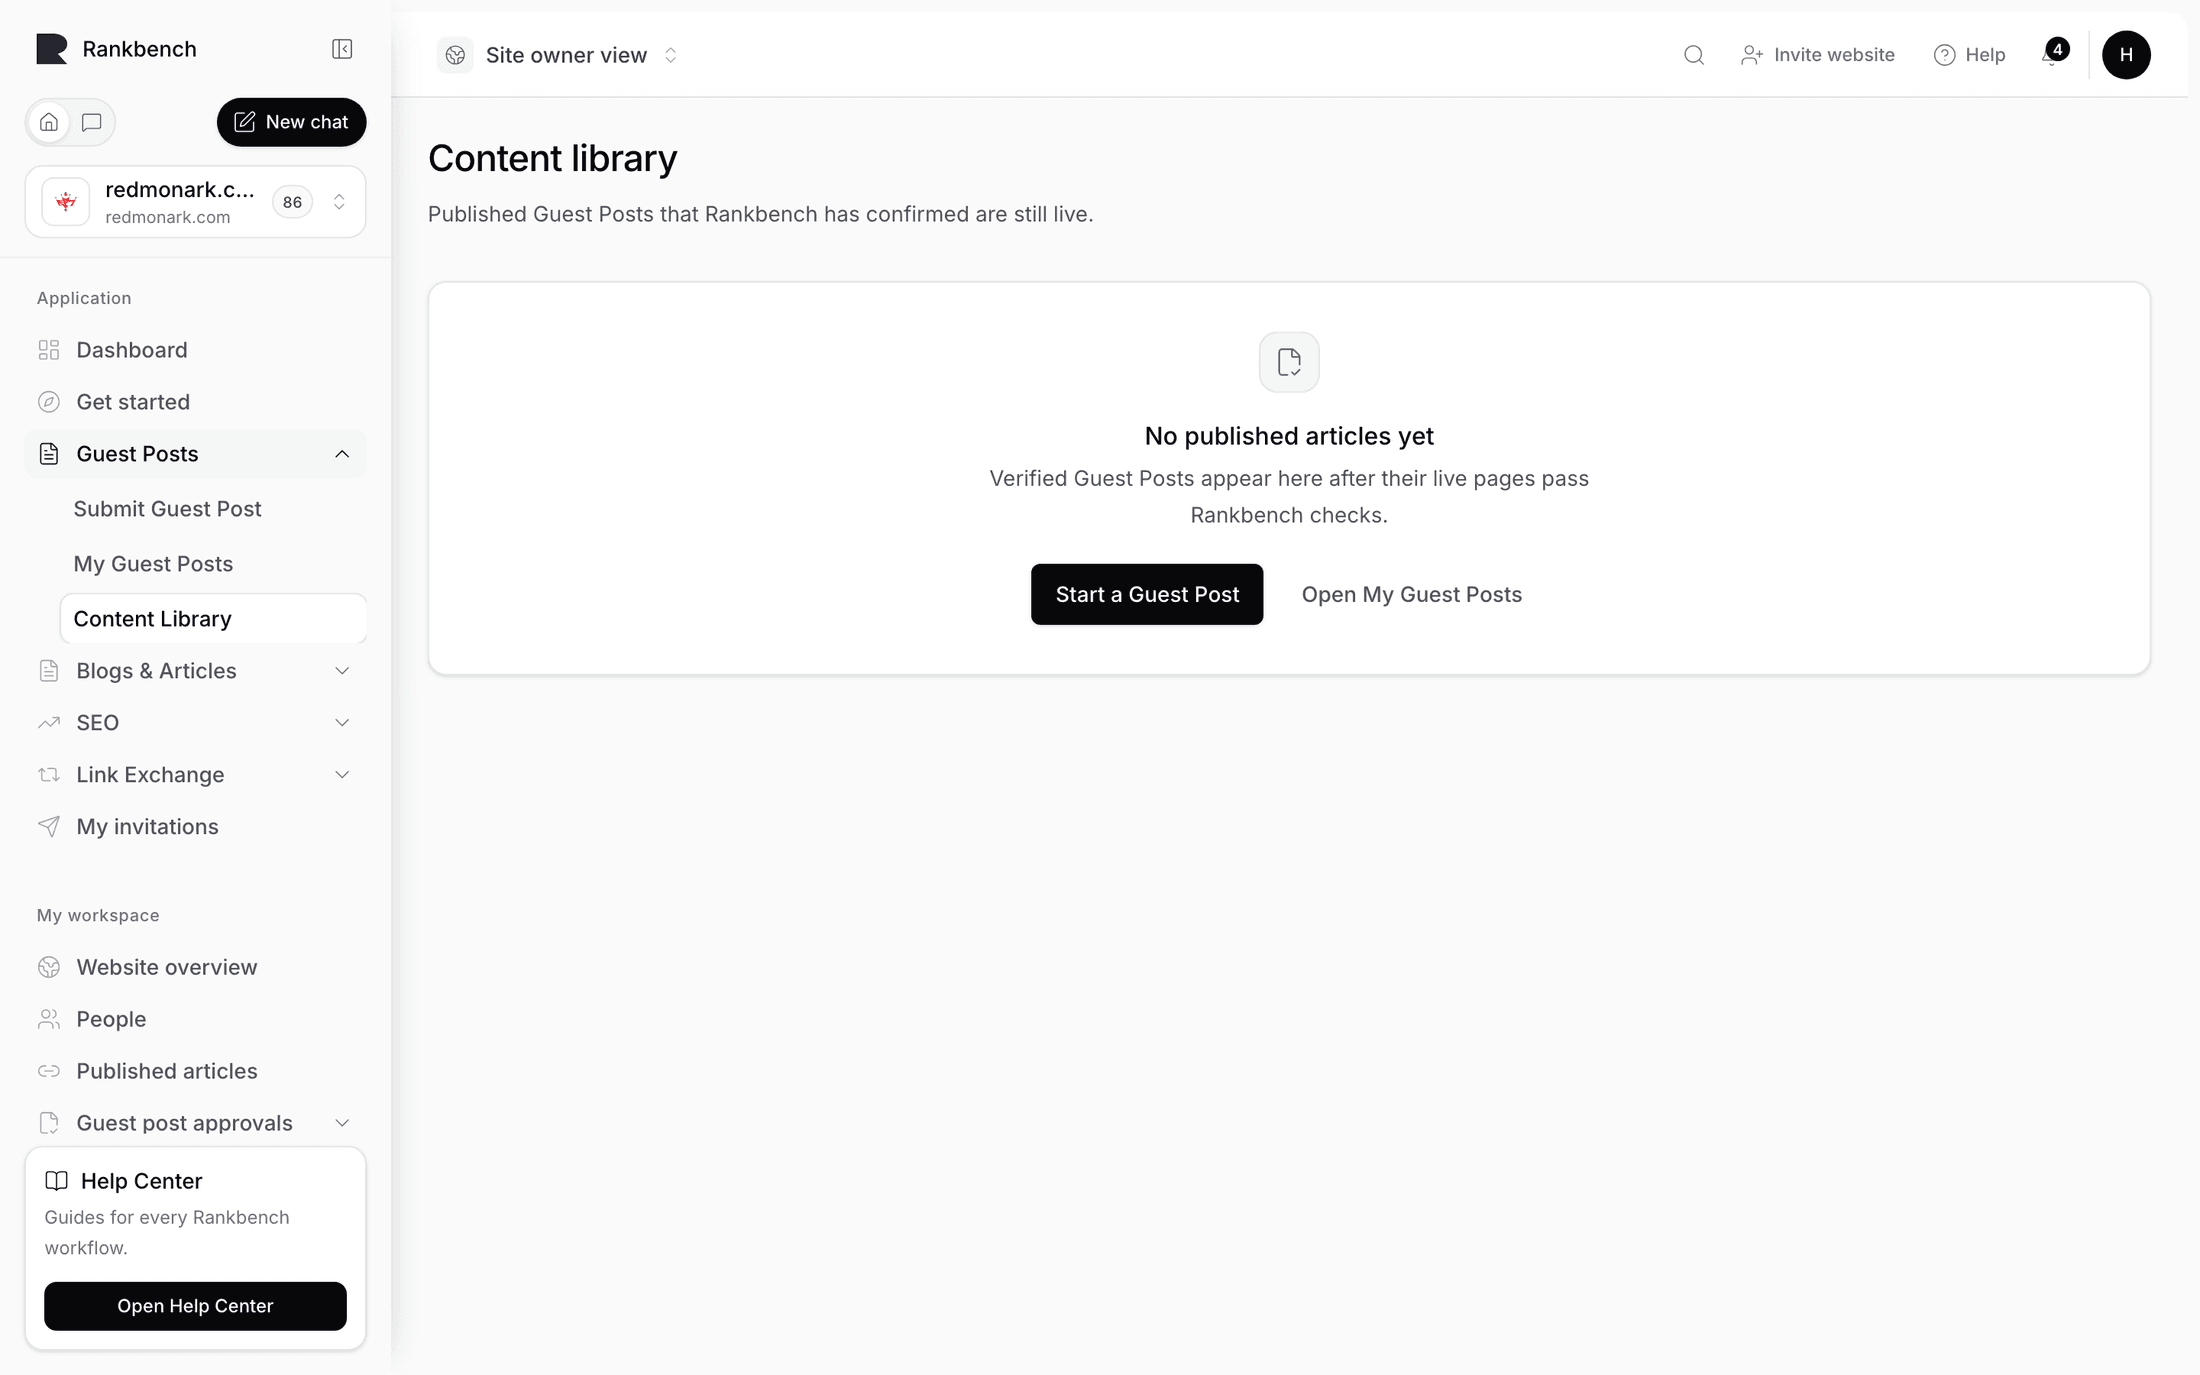
The status becomes Verified live, and a row appears in your Content Library. That row is created exactly once, by a passing check, and never by hand. Which is what makes it worth showing to the next site you pitch: every article in there has been confirmed on the open web. The Content Library covers what it holds and who can see it.

If validation fails, you'll be told, along with the admins on the other side. Usually the published version dropped a link or changed its wording during their editing pass. A polite comment naming the missing link fixes it.

What to do differently on your second post

Read the guidelines before you pick the topic, not after you've written it. Every rejection I've seen at the topic level was avoidable in ninety seconds.

Cut your link count in half. Then check it against their maximum in Links and metrics before you send.

Write the title for their readers, not for your keyword. The site's editor is choosing between your piece and the next one, and a title that sounds like an ad reads as a favour you're asking.

And keep a shortlist. Once you've been published by one site in your area, the next one is a much easier conversation, and your Content Library is the argument.

Where to go from here

  • Tracking your guest posts: every status in the journey and what each one means
  • Writing in the Rankbank editor: the full editor tour, panel by panel
  • Guest posting on Rankbank: the deal in plain words, and what both sides get
← Connecting Search Console and turning its data into clicksRunning guest posts on your site without letting quality slip →

Still stuck?

Open Rankbank and the page this article describes — most screens explain themselves as you go.

On this page

What you'll have by the endArriving from a linkRead the rules before you writeBringing the article inThe pre-flightReading your own link table like an editorWhile they readThe change requestApproved, published, verifiedWhat to do differently on your second postWhere to go from here
Rankbank — Editorial collaborationOpen RankbankHelp home